At its heart, conducting a risk assessment is a pretty straightforward idea: you systematically look for what could cause harm, figure out how likely it is to happen, and then put sensible controls in place to stop it. It’s the cornerstone of building a safe and resilient workplace, helping you get ahead of problems instead of just reacting to them.
Your Guide to Practical Risk Assessment
Kicking off a risk assessment can feel like a huge task, but it really just boils down to a structured way of thinking about what could go wrong and how you can prevent it. This guide will break the process down into clear, manageable actions. Think of it as a methodical way to examine your workplace, spot potential hazards, and assess the risks before they ever lead to an injury or incident.
We’ll walk through five core stages. It’s important to see this not as a one-off task you tick off a list, but as a continuous cycle of improvement. This very approach is central to Australia's ongoing efforts to reduce workplace injuries. In 2022, the nation saw 1.3 fatalities per 100,000 workers, a figure that, while tragic, shows a gradual improvement thanks to diligent safety practices like these.
The Five Core Stages of Assessment
To bring this to life, we'll use a small manufacturing workshop as a running example throughout this guide. This will help show how these concepts work in a real, hands-on environment. The aim is to take the mystery out of the process and give you the confidence to build a safer workplace, one step at a time.
This diagram lays out the five essential stages of a risk assessment, from the initial discovery of a hazard right through to ongoing review and improvement.
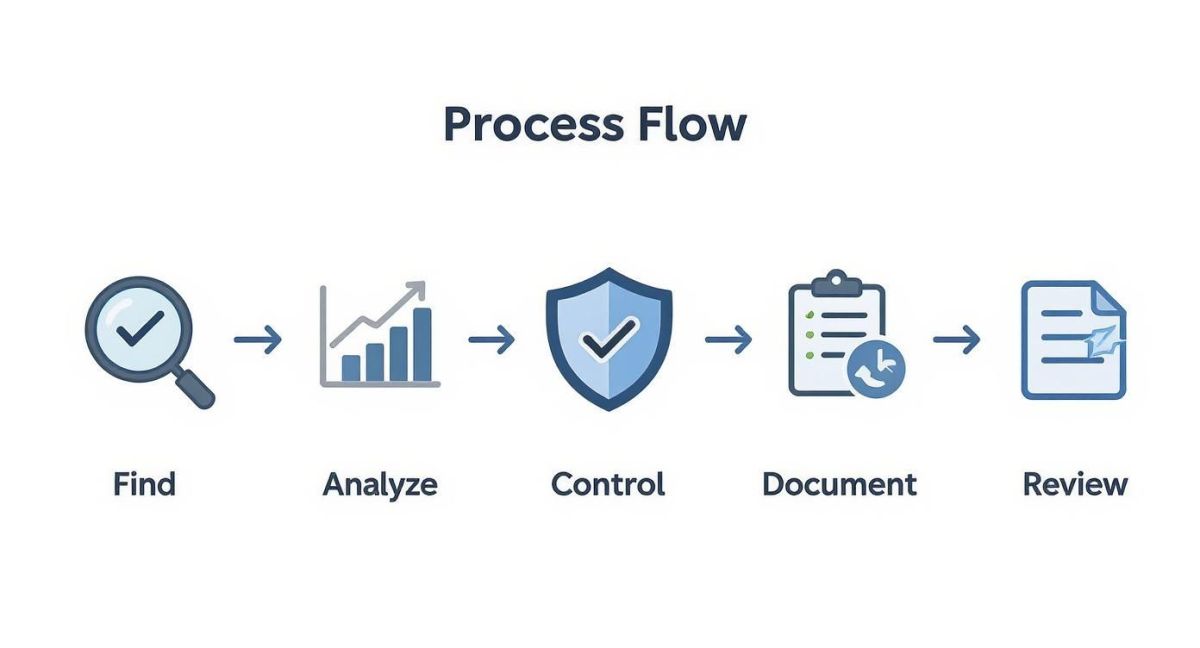
As you can see, risk management isn’t a project with a finish line. It’s a loop—a cyclical process that demands constant attention to keep your team safe.
Here's a quick look at the core stages involved in any comprehensive risk assessment.
The Five Stages of a Risk Assessment
| Stage | Key Objective |
|---|---|
| Find Hazards | To proactively search for anything in the workplace that has the potential to cause harm. |
| Analyse Risks | To determine the likelihood and severity of harm once a hazard is identified. |
| Control Risks | To implement measures that either eliminate the hazard or reduce the risk to an acceptable level. |
| Document Findings | To keep a formal record of the assessment, the controls, and the reasoning for compliance and future reference. |
| Review and Update | To regularly revisit the assessment to ensure controls are working and the assessment remains relevant. |
Each of these stages builds on the last, creating a solid foundation for your safety management system.
A risk assessment is so much more than a compliance document. It's a living, operational tool that actively shapes a culture of safety and foresight within an organisation. It’s about empowering your team to take ownership of their environment.
Once you have your findings, the next step is implementation. For a deeper dive into turning your assessment into action and strengthening your overall defences, it’s worth exploring a practical framework to improve security posture.
Finding and Categorising Workplace Hazards
The first real step in any risk assessment is figuring out what could actually cause harm in your workplace. This isn't just about spotting the obvious dangers; you need to dig a little deeper to uncover the risks that aren't immediately apparent. The best way to do this is with a structured approach so nothing critical gets missed.
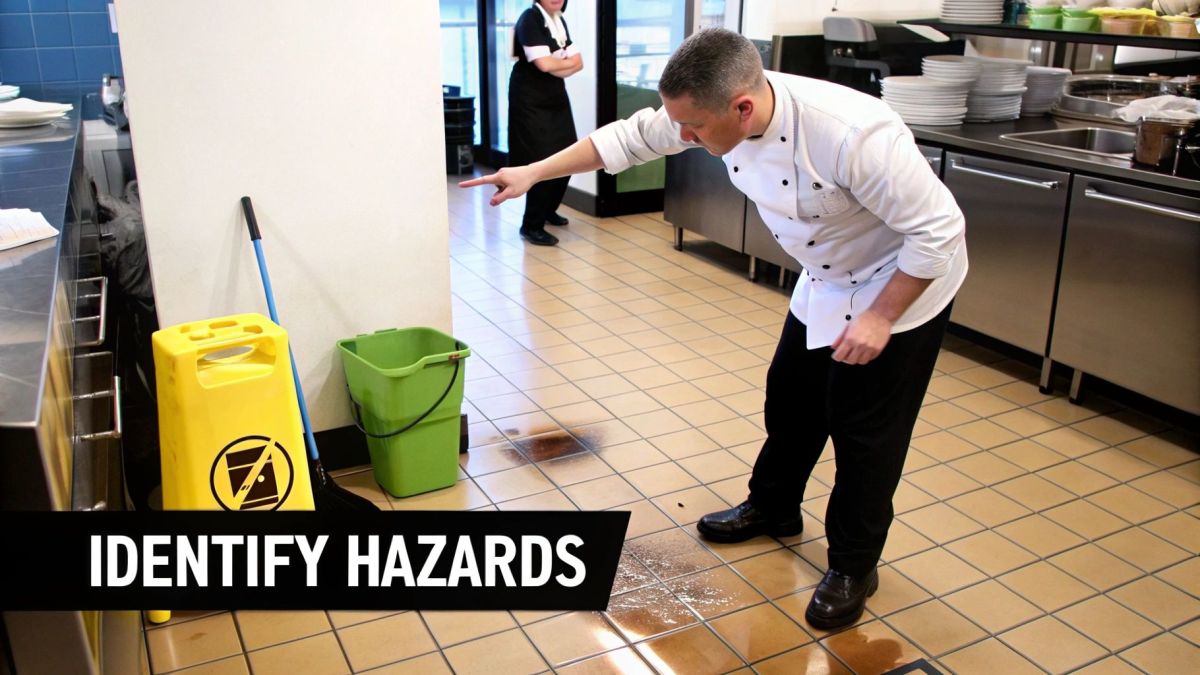
Think of it like being a detective at your own worksite. Start by doing a physical walkthrough, but try to see the space with fresh eyes. Instead of just seeing a busy kitchen, look for the potential for wet floors from spills, hot stovetops, or stray power cords from equipment. These are all classic physical hazards.
Digging Deeper for Hidden Dangers
But your investigation can't stop at what you can see. Often, the most useful clues are hidden in places people forget to look. A fantastic starting point is reviewing your past incident reports and any near-miss logs. These documents are a goldmine of information, telling you exactly where the weak spots in your safety systems might be.
Next, have a chat with the people on the ground doing the work every day. Your team has a firsthand understanding of the daily operational headaches. They know which machine always acts up or which corner has a dangerous blind spot. Their insights are invaluable. For a deeper dive into building this kind of practical safety knowledge, resources on creating a high-impact health safety course can be incredibly helpful.
Once you've collected all this information, it's time to start sorting the hazards into logical groups. This makes the data much easier to manage. Common categories usually include:
- Physical Hazards: Think slippery floors, unguarded machinery, excessive noise, or poor lighting.
- Chemical Hazards: This covers everything from cleaning solutions to industrial solvents—any substance that could cause illness or injury.
- Ergonomic Hazards: Things like poorly set-up workstations, highly repetitive tasks, or bad lifting techniques that lead to strains and injuries.
- Psychosocial Hazards: This includes high-stress environments, unreasonable workloads, workplace bullying, or a lack of support.
The Growing Importance of Psychosocial Risks
It’s all too easy to focus on the physical dangers you can see and touch, but psychosocial hazards are finally getting the attention they deserve. These risks hit mental wellbeing hard and can be just as debilitating as a physical injury.
In Australia, a truly effective risk assessment now has to integrate mental health as a core safety component. The data is clear: mental health conditions now account for 12% of all serious workers' compensation claims, and that number has shot up by a massive 161% over the last decade.
This really drives home the point that a thorough assessment needs to look at the whole picture—the culture and the psychological environment included. If you ignore these factors, you're only solving half the problem. By methodically identifying and categorising every potential hazard, from a frayed electrical cord to a toxic deadline culture, you create a solid foundation for a truly effective risk assessment.
Analysing and Prioritising Identified Risks
Once you've got a list of potential hazards, the real work begins. You need to figure out which ones are genuinely worth losing sleep over. Let's be honest, not all risks are created equal, and a smart risk assessment is all about focusing your time and resources where they’ll make the biggest difference. This is where analysis and prioritisation come into play.
It all boils down to two surprisingly simple but powerful questions:
- How likely is it that this hazard will actually cause an incident?
- If it does happen, how severe will the consequence be?
Answering these two questions helps you sort through the noise and create a clear action plan. It’s the same logic you'd use in first aid—a paper cut and a deep gash are both injuries, but one obviously needs your immediate attention far more than the other.
Using a Risk Matrix to Clarify Priorities
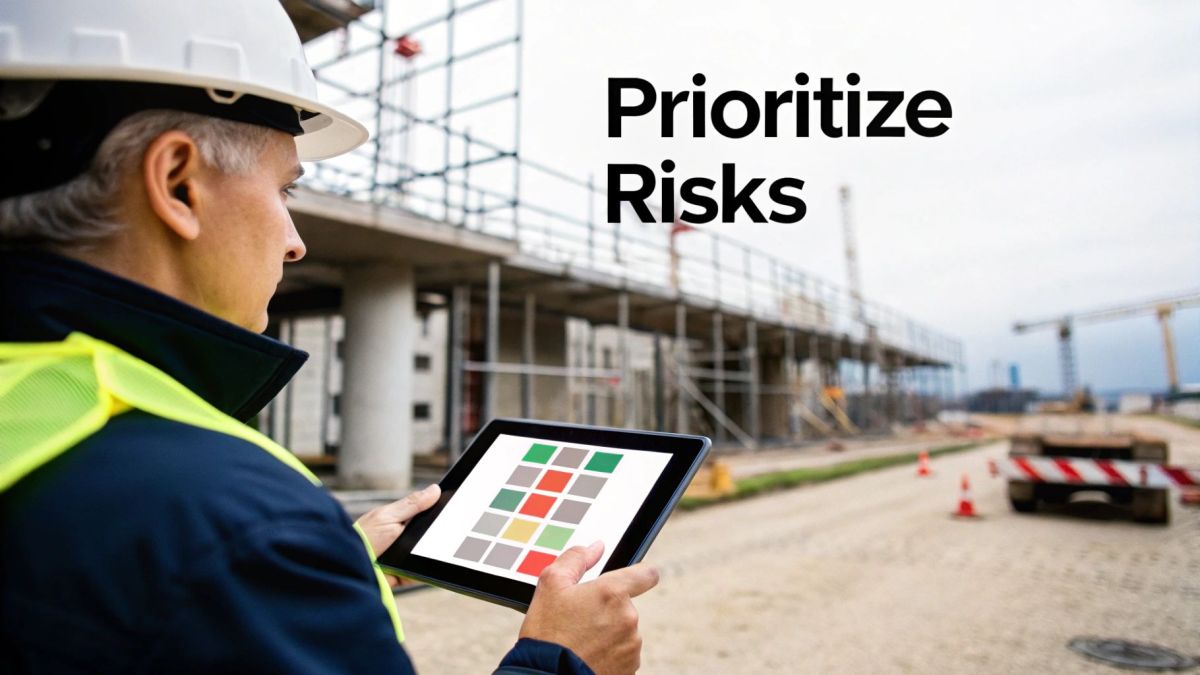
One of the best tools I've found for this is a risk matrix. It’s basically a grid that helps you visually plot each risk based on its likelihood and potential consequence. This gives you a quick, at-a-glance snapshot of what you're dealing with. By mapping everything out, you can instantly see which hazards are just minor annoyances and which ones are genuine, high-priority threats.
Let's walk through a real-world example from a construction site. Imagine you've identified two separate hazards:
- Hazard A: A loose power cable is trailing across a corner in a low-traffic area.
- Hazard B: A heavy-duty crane is operating right next to a public walkway.
The chance of someone tripping over that cable is probably quite high, but the consequence is likely to be minor—a scraped knee or a bruised ego. On the other hand, the likelihood of a catastrophic crane failure is extremely low. But if it did happen? The consequence would be disastrous, involving potential fatalities and huge structural damage.
A risk matrix pushes you to think critically about both probability and impact. It turns vague worries into concrete data you can use to justify where you spend your money and direct your safety efforts.
When you plot these on a matrix, the priority becomes crystal clear. The crane failure, despite being highly unlikely, is a far greater risk because its potential outcome is catastrophic. It demands the most robust controls, like stringent engineering checks and daily inspections. The trailing cable still needs to be dealt with, of course, but it can be managed with simpler controls like taping it down or using cable covers.
A risk matrix helps you assign a rating to each hazard so you can prioritise them effectively. Here’s a simple example of what one looks like.
Simple Risk Matrix Example
| Likelihood vs. Consequence | Insignificant | Minor | Moderate | Major | Catastrophic |
|---|---|---|---|---|---|
| Almost Certain | Medium | High | Extreme | Extreme | Extreme |
| Likely | Low | Medium | High | Extreme | Extreme |
| Possible | Low | Medium | High | High | Extreme |
| Unlikely | Low | Low | Medium | High | High |
| Rare | Low | Low | Low | Medium | High |
By using a structured tool like this, your risk assessment transforms from a simple list of problems into a strategic roadmap for safety. You can systematically tackle the biggest dangers first, which is the whole point of this exercise—making the workplace safer for everyone. This methodical evaluation is what separates a token effort from a truly effective assessment.
Implementing Effective Risk Controls
Spotting and prioritising risks is a huge step, but it’s only half the battle. Now comes the part where you actually make things safer. This is where we shift from thinking to doing, and the best way to approach it is with a framework that safety professionals have trusted for years: the Hierarchy of Controls.
The logic is simple but powerful. It's always better to get rid of a danger completely than to just teach people how to work around it. The hierarchy gives you a structured way to think, forcing you to consider the strongest, most permanent solutions first before settling for less effective ones. This stops us from just jumping to the easiest fix, like handing out safety gear, which is a common but risky shortcut.
Working Through the Hierarchy of Controls
Let's walk through the five levels of the hierarchy, starting with the most effective and working our way down. We’ll use a common drone scenario: the risk of flying too close to power lines.
-
Elimination: This is the gold standard of safety. You physically remove the hazard. In our drone example, you’d redesign the flight path to avoid the area with power lines altogether. The hazard is gone. Simple.
-
Substitution: Can't eliminate it? The next best thing is to replace the hazard with something less risky. This might mean using a drone with advanced obstacle avoidance sensors that can automatically detect and steer clear of wires, swapping a high-risk manual flight for a lower-risk automated one.
These top two levels are where you get the most bang for your buck. They tackle the root of the problem head-on.
Engineering and Administrative Solutions
When you can't get rid of the hazard entirely, you move down to controls that put a barrier between people and the danger or change the way they operate.
Engineering Controls are about making physical changes to the equipment or environment. For our power line problem, this could involve using a drone equipped with a 'geofence' – a virtual barrier programmed into the flight controller that physically prevents the drone from entering the high-risk zone near the wires.
Administrative Controls, on the other hand, are about changing how people work. These are your procedures and rules. For instance:
- Establishing a mandatory pre-flight briefing where the location of all power lines is reviewed on a map.
- Requiring a visual observer whose sole job is to watch the drone and maintain clearance from hazards.
- Placing cones or signs on the ground to mark the no-fly zone directly below the power lines.
It's crucial to realise that administrative controls and PPE depend entirely on people doing the right thing, every single time. They're far less reliable than designing the hazard out of the operation from the start.
The Last Line of Defence
At the very bottom of the hierarchy, you’ll find Personal Protective Equipment (PPE). This is your last resort when all other options have been exhausted. For a drone pilot, this isn’t about the drone itself, but about the ground crew—think hard hats and high-vis vests for a construction site survey.
While often necessary, PPE should never be your starting point. It doesn't remove the hazard; it just adds a fragile layer of protection for the individual. If a hard hat is your only plan to deal with falling objects, you've missed the point.
A robust risk assessment always aims for the top of the hierarchy first, only using PPE as a final safety net. This strategic approach is what separates a tick-box safety exercise from a genuinely resilient safety culture.
Getting It All Down on Paper: Documenting and Reviewing Your Assessment
A risk assessment that just lives in your head isn't worth much. Its real power comes when it's a written, living document that shapes your entire safety culture. Think of it as the safety blueprint for your operations, clearly laying out the what, why, and how of your safety measures. This isn't about creating pointless paperwork; it’s about creating clarity and accountability for everyone involved.
Your final report has to be more than just a list of problems. For every hazard you've spotted, the documentation needs to be straightforward and easy for anyone on your team to pick up and understand. A solid report details exactly what you’ve found and the concrete steps you're taking to manage it.

This written record becomes your single source of truth for all safety decisions. It’s also an indispensable tool for training new pilots and crew, and it’s your proof of due diligence if things ever go wrong.
Creating a Clear and Actionable Record
To be truly useful, your risk assessment document needs a few key components. The goal here is function, not fluff. Keep it simple and focus on what matters.
Make sure you cover off these key points:
- The Hazard Identified: Be specific. Instead of "bad weather," write "Sudden high-wind gusts exceeding drone's operational limits."
- Who Is at Risk: List everyone and everything that could be affected. This might be your "ground crew, the public in the park below, the UAS itself, and client property."
- Existing Controls: What are you already doing? (e.g., "Pre-flight weather checks using multiple sources.")
- Required Actions: What new controls will you add? This is where you put your mitigation plan into action.
- Responsibility: Who owns this? Assign a specific person or role (e.g., "Pilot in Command") to implement and maintain each control.
- Completion Date: Give it a deadline. When will this new control be active?
This structure transforms your findings from a simple list into a genuine action plan. It takes you beyond just knowing how to conduct a risk assessment and puts you firmly in the driver's seat of making your operations safer.
Why You Can't Just 'Set and Forget'
This is critical: a risk assessment is not a one-and-done job. It's a living document that has to evolve right alongside your operations. Setting a regular review schedule is non-negotiable if you want it to stay relevant and effective.
Your risk assessment must be a forward-looking tool. It should anticipate changes and adapt, ensuring your safety protocols never become outdated or irrelevant to your current operational reality.
This proactive approach is exactly what we see in major national frameworks. Take Australia’s National Climate Risk Assessment (NCRA), for example. It evaluates risks right now and projects them forward to 2050, proving how vital it is to think about both present and future scenarios. You can learn more about how national risk assessments incorporate long-term planning.
As a rule of thumb, plan to formally review your assessment at least annually. But you absolutely must revisit it immediately whenever there's a significant change. That could be introducing a new drone, flying in a new type of environment, or after any incident or near-miss. This cycle of documentation and review is what builds a true culture of safety and continuous improvement.
Common Risk Assessment Questions
Even with a solid plan, you're bound to hit a few questions when you're deep in the weeds of a risk assessment. That's completely normal. Let's walk through some of the most common ones I hear from operators, because getting these sorted can make the whole process much smoother.
How Often Should I Review My Risk Assessment?
My standard advice is to review it at least once a year. But honestly, that’s just the baseline. A risk assessment isn't a "set and forget" document; it's a living part of your operation.
You'll need to pull it out and update it anytime something significant changes. This could be:
- Bringing in new gear, like a different drone model with new capabilities or limitations.
- Altering your procedures or starting to fly in completely new environments (e.g., urban vs. rural).
- Right after an incident or, just as importantly, a near-miss. These are golden opportunities to learn and adapt.
Keeping it current ensures your safety measures aren't just for show—they're actually relevant to the work you're doing today.
Who Should Be Involved in the Process?
Don't try to be a lone wolf on this one. The best risk assessments come from teamwork. You absolutely need to bring in the people who are actually out there flying the missions. Your ground crew and pilots have the real-world, hands-on knowledge of what can go wrong.
Sometimes, for really complex jobs—think operating near critical infrastructure or in high-risk airspace—it pays to bring in a health and safety consultant or an external specialist. More perspectives almost always lead to a stronger, more thorough assessment.
I see this mistake all the time: a manager writes the risk assessment in an office, completely disconnected from the field. Real safety comes from shared ownership. When you involve your whole team, you not only get a better assessment, but you also build a culture where everyone takes safety personally.
What Is the Difference Between a Hazard and a Risk?
This one trips a lot of people up, but the difference is simple and incredibly important.
A 'hazard' is anything with the potential to cause harm. Think of a sudden, strong gust of wind, a low battery warning flashing on your controller, or a flock of birds crossing your flight path. They're all hazards.
A 'risk' is the chance that a hazard will actually cause harm, combined with how bad that harm could be. The flock of birds is the hazard. The risk is the high probability of a mid-air collision leading to catastrophic drone failure and potential injury to people below.
Your job in the assessment is to control the risk that the hazard presents. Nailing this distinction helps you focus on what could actually happen, not just the "thing" itself.
At Innoflight International, we know that a solid risk assessment is the backbone of any professional UAS operation. We build our advanced drone platforms with safety and reliability as top priorities, giving you the dependable hardware you need to manage your operational risks. If you're looking to build a safer and more efficient workflow, check out our versatile drone solutions.