Getting an accurate land area measurement is the cornerstone of any decent development, farming, or investment project. The short answer? You fly a drone over it, use some specialised software to stitch the images together, and create a digital map so precise you can calculate the area down to the centimetre.
Why Modern Land Measurement Has Taken Flight
Sure, for a small, flat backyard, you could probably get by with a long tape measure or by pacing out the boundaries. But these old-school methods fall apart completely when you're looking at large, complex, or hard-to-reach properties.
Just imagine trying to measure a 50-hectare farm with rolling hills, or a block of land covered in dense bush. It would take ages, and the chances of getting it right are slim to none.
This is where technology has completely changed the game. Drones fitted with high-resolution cameras (for photogrammetry) or laser scanners (LiDAR) are just a far better way to do it. They bring a level of speed, accuracy, and detail that was once impossible for most projects.
The Shift from Ground to Sky
The move to aerial surveying is really about one thing: getting better data. Instead of spending days on the ground collecting a handful of measurement points, a drone can capture millions of them in a single short flight.
This wealth of information is a massive advantage for all sorts of industries:
- Agriculture: Farmers can measure their fields with incredible precision to figure out exactly how much seed and fertiliser they need, saving money and improving yields.
- Construction: Developers get highly accurate topographical maps, which are essential for planning a site layout and calculating how much earth needs to be moved.
- Real Estate: Investors can get verifiable area data for accurate valuations and proper due diligence.
If you're looking to buy property, getting the land area right is a fundamental part of your research. In fact, it’s a key step in learning how to be a smart land investor and making sure you’ve done your homework.
This need for precision isn't just for private projects; it's a national priority. The World Bank, for instance, reported Australia's land area as 7,692,020 square kilometres in 2023. That number comes from incredibly accurate geological surveys. This kind of accuracy, maintained by organisations like Geoscience Australia, is vital for national planning and development.
Think about it this way: modern drone surveys don't just measure the area. They create a complete digital twin of your property. This gives you powerful insights into elevation, drainage, and terrain that you could never get from the ground. It's not just about being faster; it's about making smarter, data-driven decisions.
Choosing Your Drone Technology: Photogrammetry vs. LiDAR
So, you're ready to use a drone for measuring land. Great! The first big decision on your plate is picking the right technology for the job. Your two main contenders are Photogrammetry and LiDAR (which stands for Light Detection and Ranging). Both can create incredibly detailed maps, but they get there in completely different ways. Getting this choice right from the start is absolutely critical for accurate results.
Think of photogrammetry as building a sophisticated 3D puzzle from thousands of photos. The drone flies a precise, grid-like pattern over the land, snapping hundreds (or even thousands) of high-resolution, overlapping pictures. Afterwards, powerful software like Pix4D or Agisoft Metashape gets to work, finding common points in the images and stitching them all together into a measurable 3D model and a flat, map-like image called an orthomosaic.
This method is fantastic for wide-open spaces—think sprawling farm fields, new construction sites, or large quarries. Because it's based on actual photos, the final model is visually rich and easy to interpret. It's not just about the measurements; you get a real-world view of the property. For many projects, this is the most cost-effective and practical way to go.
When to Choose LiDAR
LiDAR, on the other hand, is a different beast entirely. Instead of a camera, the drone carries a sensor that shoots out millions of tiny laser pulses. It measures the time it takes for each pulse to bounce off an object and return, creating an exceptionally dense and accurate 3D "point cloud" of the landscape.
The killer feature of LiDAR? It can see through trees. Where photogrammetry just captures the top of the forest canopy, many of LiDAR's laser pulses will find their way through gaps in the leaves and branches to hit the actual ground underneath. This makes it the only reliable option if you're trying to measure a property covered in dense bush or forest.
LiDAR is the tool you reach for when the true ground surface is what you need to measure, not the trees, shrubs, or buildings sitting on top of it. For any site with significant vegetation, LiDAR will deliver a much more accurate ground model and, by extension, a far more precise area calculation.
This decision tree gives a good visual breakdown of when to use which method.
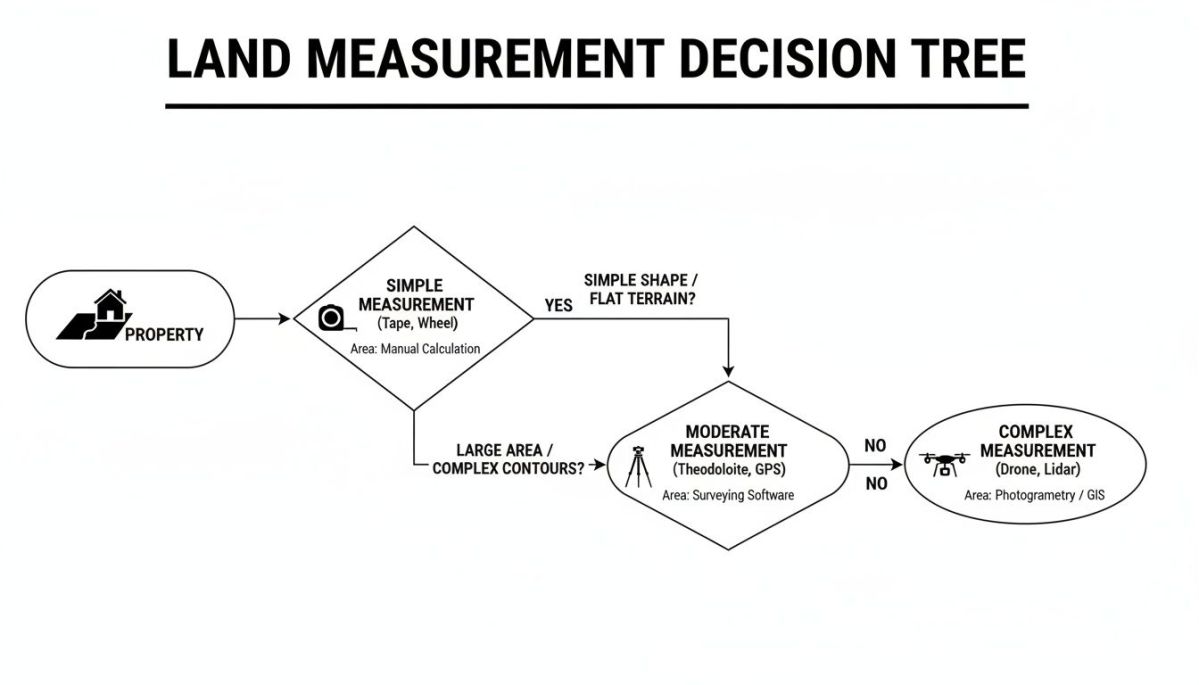
As you can see, simple, flat, and open properties can often be measured with basic tools. But as soon as complexity like hills, vegetation, or large scale comes into play, you need to step up your game. It’s all about matching the tech to the terrain.
Comparing Photogrammetry and LiDAR for Land Area Measurement
To make it even clearer, here’s a head-to-head comparison to help you decide which technology is the right fit for your project, budget, and the conditions on the ground.
| Feature | Photogrammetry | LiDAR |
|---|---|---|
| How It Works | Stitches together thousands of overlapping photos to create a 3D model. | Measures distance using millions of laser pulses to create a 3D point cloud. |
| Best For | Open areas, agricultural fields, construction sites, quarries. | Densely vegetated areas, complex terrain, forestry, corridor mapping. |
| Accuracy | High, but can be affected by shadows, uniform surfaces, and vegetation. | Extremely high, especially for bare-earth ground models. |
| Vegetation Penetration | Poor. Captures the top of the canopy, not the ground beneath. | Excellent. Laser pulses penetrate foliage to map the true ground surface. |
| Cost | Generally lower. Equipment and software are more accessible. | Significantly higher. Both hardware and processing demand a larger investment. |
| Output | Visually realistic, full-colour 3D models and orthomosaic maps. | Highly detailed point clouds, Digital Elevation Models (DEMs). |
| Weather/Light Needs | Requires good, consistent lighting. Overcast is ideal; avoid harsh sun/shadows. | Can operate in lower light conditions and is less affected by shadows. |
Ultimately, the choice isn't about which one is "better" overall, but which one is better for your specific site. For a clear, open paddock, photogrammetry is a smart and economical choice. But for a 50-hectare block of dense bushland, LiDAR is the only way you'll get a truly accurate measurement of the ground itself.
Planning Your Drone Survey for Flawless Data
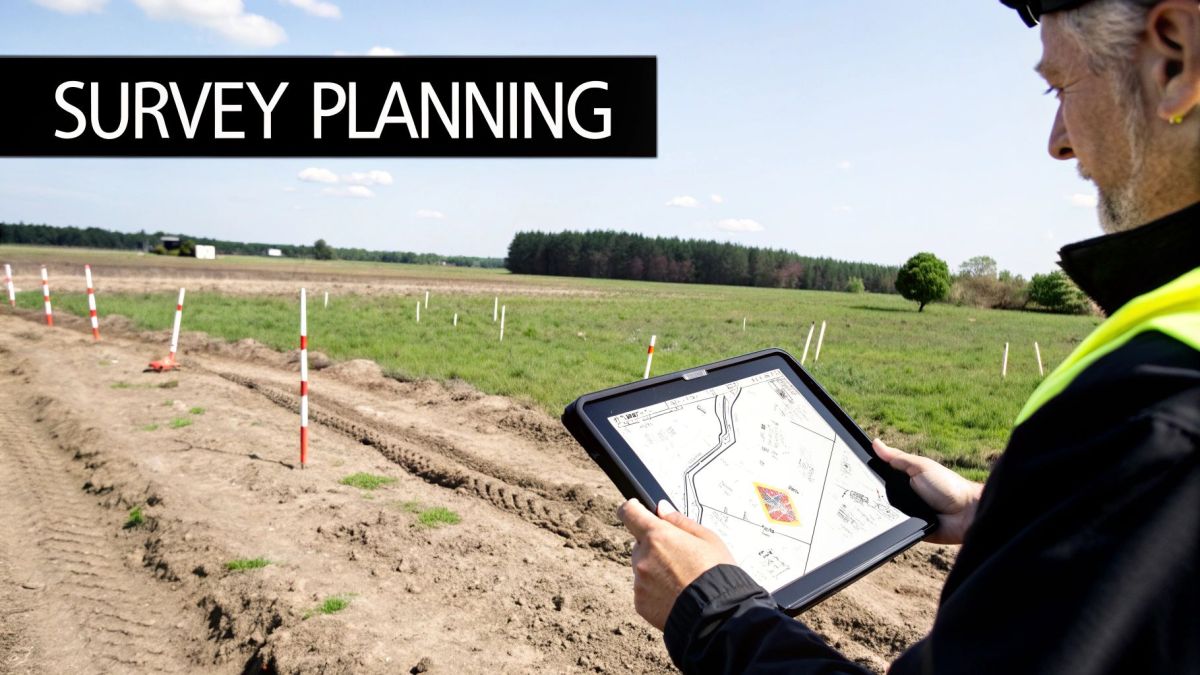
Getting high-quality data from a drone isn't about luck. It all comes down to careful planning. The work you do on the ground before the propellers even start spinning is what really dictates the success of your entire project. This pre-flight prep is where you turn a rough idea into a concrete mission that delivers the accuracy you need.
A solid plan takes the guesswork out of the equation and, more importantly, prevents the headache of having to re-fly the site. It ensures every single image contributes to a precise final map, which is the bedrock of any accurate land area measurement.
Defining Your Survey Area and Flight Path
First things first: you have to clearly define the boundaries of the land you're measuring. Most professional flight planning software makes this simple by letting you import a KML file. This is a standard geographic data format you can easily create in free tools like Google Earth, giving your software an exact digital perimeter to work from.
Once you’ve locked in the boundary, the software will automatically generate an efficient flight path—usually a neat grid pattern—to guarantee complete coverage. From there, it’s all about dialling in the flight parameters.
- Flight Altitude: This is always a balancing act between coverage and detail. Flying higher lets you cover more ground faster, but you sacrifice image resolution. Fly lower, and you'll get incredible detail, but you'll burn through more time and batteries. For most land area surveys, an altitude that gives you a Ground Sampling Distance (GSD) of 2-5 cm per pixel is a great starting point.
- Image Overlap: This one is non-negotiable if you want good results. To stitch together a seamless map, each photo needs to overlap significantly with its neighbours. A standard setting is 75% front overlap and 75% side overlap. If you try to skimp on this, you’ll end up with gaps and warping in your final map—a real mess.
Ensuring Survey-Grade Accuracy with GCPs
A drone's onboard GPS is pretty good, but it's not perfect. When a project demands the highest level of precision—what we call survey-grade accuracy—you absolutely have to use Ground Control Points (GCPs).
GCPs are just physical markers you place on the ground throughout your survey area. The key is that their exact coordinates are measured with high-precision GPS gear, like an RTK rover. Later, during data processing, you'll tag these visible markers in your drone imagery. You're essentially telling the software, "This specific pixel is located at this exact real-world coordinate." This crucial step anchors your entire map to the ground with centimetre-level accuracy.
Think of it like this: without GCPs, you're measuring a highly detailed but essentially "floating" map. With GCPs, you're measuring a map that's been locked to its true position on Earth, giving you data that's verifiable and defensible.
Navigating Weather and Regulations
Finally, no plan is complete without thinking about the things you can't control. Weather is the big one. High winds, rain, or even patchy clouds can completely ruin a survey. Always check the forecast and try to fly on calm, overcast days for the most even and consistent lighting.
Just as important are the local aviation rules. Here in Australia, the Civil Aviation Safety Authority (CASA) sets the rules for all drone operations. Flying for any commercial reason, and that includes land surveying, means you have to follow specific regulations. Before you even head to the site, make sure you know the airspace restrictions, no-fly zones, and any other local requirements. It's not just about staying compliant; it's about operating safely and professionally.
Executing Your Drone Flight in the Field
With a solid plan in your hands, it’s time to head out to the site. This is where all that careful preparation pays off, turning your digital strategy into high-quality raw data. Funnily enough, the actual flight is often the quickest part of the whole job, but it’s one that demands your complete attention.
Before you even think about taking off, run through your pre-flight checklist. This isn’t just a box-ticking exercise; it’s a professional habit that prevents simple mistakes from ruining a day’s work. Make sure all your drone and controller batteries are at 100%, and double-check that your SD cards are formatted with plenty of free space. A forced landing halfway through a mission because of a full card is an amateur mistake you don’t want to make.
Automated Flight is Your Best Friend
These days, surveying a site with a drone rarely means flying manually with the joysticks. Instead, you'll be using automated flight planning apps like DroneDeploy, Pix4Dcapture, or the drone manufacturer’s own software. Think of these apps as your mission control—you upload the flight path you designed back at the office, and the drone executes it flawlessly.
Once the mission is launched, your main job is to be an attentive observer. Keep a close eye on the drone’s telemetry data coming back to your controller.
- Battery Life: Be ready to bring the drone home for a battery swap, especially on larger sites. Most modern apps handle multi-battery missions seamlessly, remembering exactly where the drone left off.
- Signal Strength: Watch for any potential signal dropouts, which can crop up in hilly terrain or built-up areas with interference. The drone should be programmed to return to home if it loses connection, but it's something you need to be watching.
- Image Capture: The app should give you real-time feedback as each photo is taken, confirming the camera is firing as planned.
This entire workflow is designed to measure land area with incredible accuracy. The data you’re capturing is the foundation for every calculation that comes next. It’s amazing to think that the same principles are used on a national scale. For example, Australia’s official land area of 7,688,287 square kilometres was calculated using highly advanced geospatial data and specific map projections. You can discover more about how Australia's land area is officially measured from Geoscience Australia.
Don't Pack Up Just Yet: The Post-Flight Data Check
The drone has landed safely, but your job in the field isn't quite finished. Before you start packing up your gear, do a quick spot-check of the images on a laptop or tablet. You don't have to look at every single photo, but a quick scroll through the thumbnails can reveal glaring problems like motion blur from wrong camera settings or, worse, big gaps in your coverage.
This simple five-minute check can be the difference between heading back to the office with a perfect dataset and the dawning horror of realising you have to drive all the way back to the site for a re-flight. It's a small step that brings huge peace of mind.
Once you’ve confirmed you have a full set of clean, sharp, and overlapping images, you’re good to go. This final check ensures that when you move on to processing the data, you’re starting with the best possible raw material for a truly accurate land area measurement.
Turning Raw Data into Precise Land Measurements
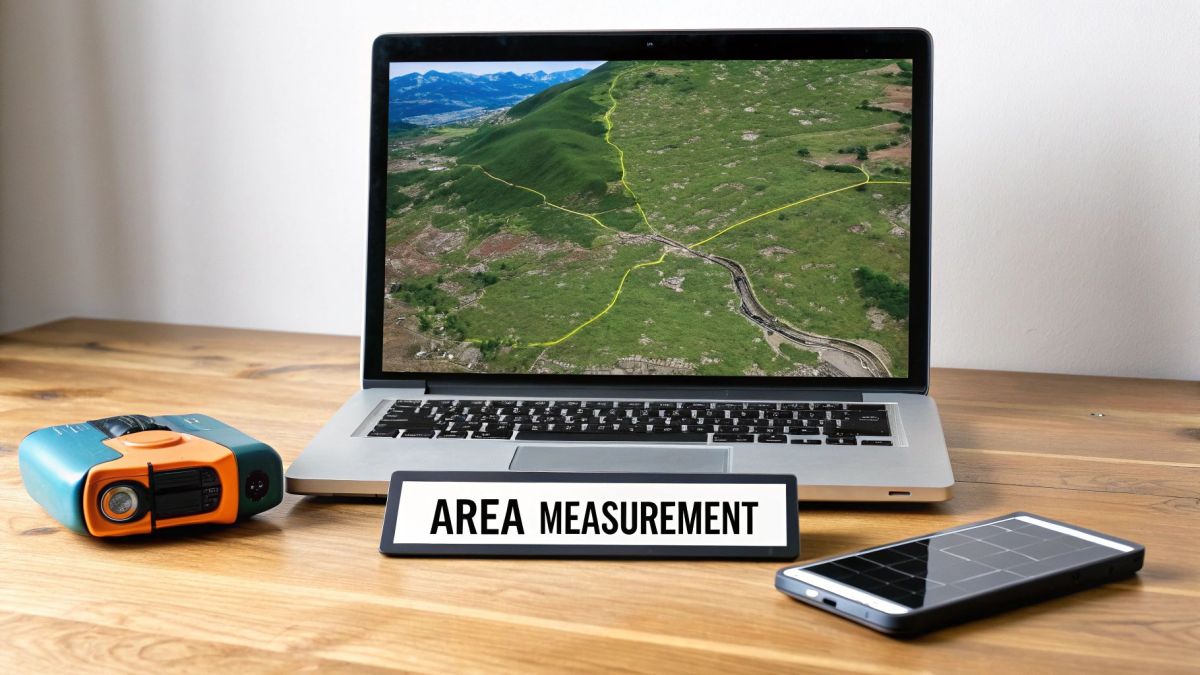
The data sitting on your drone’s SD card is pure potential. It holds the key to an accurate land measurement, but you need to process it first. This is the magic step where hundreds of individual photos or a massive LiDAR point cloud are transformed into a clear, measurable digital asset.
It might sound complicated, but specialised software does most of the heavy lifting. The goal is to create two main outputs: an orthomosaic map and a Digital Elevation Model (DEM). Think of the orthomosaic as a super high-resolution, geographically corrected version of Google Maps for your property. The DEM, on the other hand, is a 3D model of the ground's surface.
From Images to a Measurable Map
Once you've loaded your data into the software, the first job is georeferencing. If you set out Ground Control Points (GCPs), this is where they come into play. You’ll go through the images and tag the exact centre of each GCP marker, linking it to the precise coordinates you recorded in the field. This is the most important step for locking your map to its real-world location and achieving survey-grade accuracy.
With your data anchored, the software gets to work stitching it all together. Photogrammetry software analyses the overlap in your photos to build the 3D model, while LiDAR software crunches the point cloud data into a detailed surface. The final product is a seamless digital twin of your property, ready for you to analyse.
This whole process is really just a miniature version of what happens on a national scale. Measuring Australia's total land area has come a long way from early colonial surveys to the incredibly precise digital mapping we rely on today. Geoscience Australia puts the total figure at 7,688,287 km², with the mainland accounting for over 99% of that. This number comes from sophisticated datasets like the GEODATA Coast 100K 2004. If you're curious, you can learn more about how Australia's size is officially compared and calculated to see large-scale mapping in action.
Calculating and Validating Your Area
Now for the easy part. With your completed orthomosaic map open, the software gives you simple tools—usually a polygon or boundary tool—to trace the exact perimeter of the area you need to measure. All you do is click around the boundary points on your map.
As soon as you close the shape, the program instantly spits out the area inside it. You can get the final number in whatever units you need, whether that's hectares, acres, or square metres.
Don't just take the software's word for it. Always validate your results. A great way to do this is to measure a known distance on your map—like a fence line or building edge that you also measured on the ground with a tape measure—to confirm the map's scale is spot on. This final check gives you ultimate confidence in your numbers.
This is the real payoff in learning how to measure land area with a drone. It’s that satisfying moment when all the complex data captured from the sky turns into a single, reliable figure you can confidently use for planning, development, or valuation.
Common Questions About Drone Land Measurement
Whenever I talk to people just getting into drone surveying, the same handful of questions always pop up. It makes sense—you want to be sure you’re getting reliable data before you invest time and money. So, let's clear up some of the most common queries I hear.
How Accurate Is a Drone Land Measurement?
This is the big one, and the answer is: it depends entirely on your process.
If you do it right—using Ground Control Points (GCPs) and a quality drone—the accuracy is phenomenal. We're talking absolute accuracy of 2 to 5 centimetres. That’s right on par with what you'd get from traditional surveyors on the ground.
But what if you skip the GCPs and just rely on the drone's built-in GPS? The accuracy drops significantly, down to about 1 to 3 metres. That's still fine for a quick look at a farm or a preliminary site walk-through, but it’s nowhere near precise enough for serious work like boundary disputes or engineering plans.
Do I Need a Special Licence to Fly a Drone for Surveying?
In Australia, if you're flying for any reason other than for fun, the answer is a hard and fast yes. The Civil Aviation Safety Authority (CASA) is the governing body here, and they take it seriously.
To operate commercially, you'll need to get your Remote Pilot Licence (RePL), and your business might need an operator accreditation as well. Flying under CASA regulations isn't just a suggestion; it's the only way to operate legally, safely, and professionally. It's simply a non-negotiable part of the job.
Choosing the right drone technology is often the biggest hurdle. Remember, the choice between photogrammetry and LiDAR isn't about which is "better," but which is right for the specific terrain you need to measure.
What Is the Best Software for Processing Drone Data?
I get asked this all the time, and the honest answer is there's no single "best" one. It really comes down to what you're trying to achieve and how comfortable you are with complex software.
Here's how I see the main players:
- Professional Powerhouses: If you need maximum control and aren't afraid of a steep learning curve, you can't go wrong with Pix4Dmapper or Agisoft Metashape. These are the industry standards for a reason.
- User-Friendly and Cloud-Based: For people who want a more streamlined, hands-off process, DroneDeploy is a fantastic cloud-based option. It simplifies everything from planning the flight to getting your final map.
- Open-Source Alternative: If you're on a tight budget but have the technical chops, check out OpenDroneMap (ODM). It’s a brilliant open-source project that can produce genuinely high-quality results if you know what you're doing.
Can Drones Measure Land Covered in Trees?
This is a classic "it depends" scenario, and it hinges completely on the technology you're using.
Standard photogrammetry works by stitching together thousands of photos. The problem is, it can only see the tops of the trees. It’s essentially mapping the canopy, not the ground beneath it, which is useless for an accurate land measurement.
For any site with even moderate tree cover, LiDAR is the only real answer. Its laser pulses can find the gaps in the leaves and branches to map the true ground surface. This lets you generate a proper bare-earth model and measure the actual land, not just the treetops. When it comes to forests, LiDAR is the only way to get the job done right.
For Australian organisations requiring high-precision drone solutions for complex terrain, Innoflight International provides advanced UAS platforms tailored for survey-grade LiDAR and photogrammetry applications. Discover our versatile drone solutions at https://evolutionflight.com.