Think of a solar panel inspection as a thorough health check for your entire solar energy system. It's not just a quick glance at the roof. A proper inspection involves a deep dive into every component—the panels, inverters, wiring, and even the mounting hardware—to make sure everything is running safely and efficiently.
This proactive check-up is designed to catch minor issues, like dirt buildup or subtle physical damage, before they morph into major, expensive headaches. It's about ensuring your system is working at its peak potential.
Protecting Your Energy Investment

It helps to see your solar system as a long-term investment, because that’s exactly what it is. Like any high-value asset, it needs regular maintenance to perform as it should and deliver the financial returns you were promised. Ignoring it is a bit like never changing the oil in your car; a small, preventable problem can quickly spiral into a catastrophic failure.
A professional inspection is your best line of defence. It confirms you're generating the maximum amount of electricity, which directly affects your power bills and how quickly the system pays for itself. If your system is running at 80% efficiency because of an undetected fault, you're effectively losing 20% of your potential savings every single day.
Maximising Energy Output and Safety
The main goal here is to spot performance-killing issues early on. These problems can be surprisingly varied, ranging from the obvious to the virtually invisible.
- Environmental Buildup: Dust, pollen, bird droppings, and leaves can accumulate and block a significant amount of sunlight from reaching the photovoltaic cells.
- Hidden Damage: Things like micro-cracks, delamination, or faulty bypass diodes are often impossible to see with the naked eye, yet they can cripple a panel's output.
- Electrical Hazards: We're talking about loose connections, chewed-through wiring, or water getting into places it shouldn't. These aren't just efficiency killers; they are serious safety risks that can lead to fires.
By finding and fixing these issues, you don’t just boost your system's energy production. You ensure it continues to operate safely for your home and family.
Why Diligent Maintenance Matters More Than Ever
The sheer scale of solar adoption in Australia really underscores the need for consistent upkeep. As of mid-2025, Aussies have completed over 4.15 million solar panel installations, which adds up to a rated capacity of roughly 26.7 gigawatts. That’s a massive fleet of solar systems that needs careful oversight to stay efficient and last the distance.
Before we dive deeper, let's summarise the key drivers for getting your system checked.
Key Reasons for a Solar Panel Inspection
| Inspection Driver | Primary Benefit |
|---|---|
| Maximising Energy Production | Ensures you're getting the most out of your investment by catching efficiency losses early. |
| Ensuring System Safety | Identifies and mitigates electrical hazards like faulty wiring or water damage, preventing fires. |
| Extending System Lifespan | Proactive maintenance helps components last longer, delaying costly replacements. |
| Validating Warranty Claims | Many manufacturers require proof of regular maintenance to honour warranty claims if something goes wrong. |
| Peace of Mind | Knowing your high-value asset is operating correctly and safely. |
Ultimately, a routine inspection is much more than just a quick clean.
A routine solar panel inspection isn't just about cleaning panels; it's a diagnostic process that confirms every component is contributing to a safe, high-performing system, ultimately protecting your return on investment.
Thinking beyond the inspection itself, a complete maintenance strategy is what separates a good solar investment from a great one. For a broader look at what’s involved, this detailed solar panel maintenance checklist offers an excellent 8-point guide.
Your Pre-Inspection Safety and Tool Checklist
A safe and effective solar panel inspection starts long before you even think about getting on a roof. Honestly, the prep work you do on the ground is what separates a smooth, insightful job from a risky, inefficient mess. It’s all about making sure you’ve got the right gear, the right conditions, and the right safety mindset from the get-go.
Your safety is the absolute priority. Before you touch a single component, you must run through the proper shutdown procedure. This sequence isn't one-size-fits-all; it changes from one system to the next, so always check the manufacturer's manual for the specific inverter and battery you're working with. Typically, you'll start by switching off the solar supply main switch and the inverter AC isolator, then the DC isolator.
Essential Tools for the Job
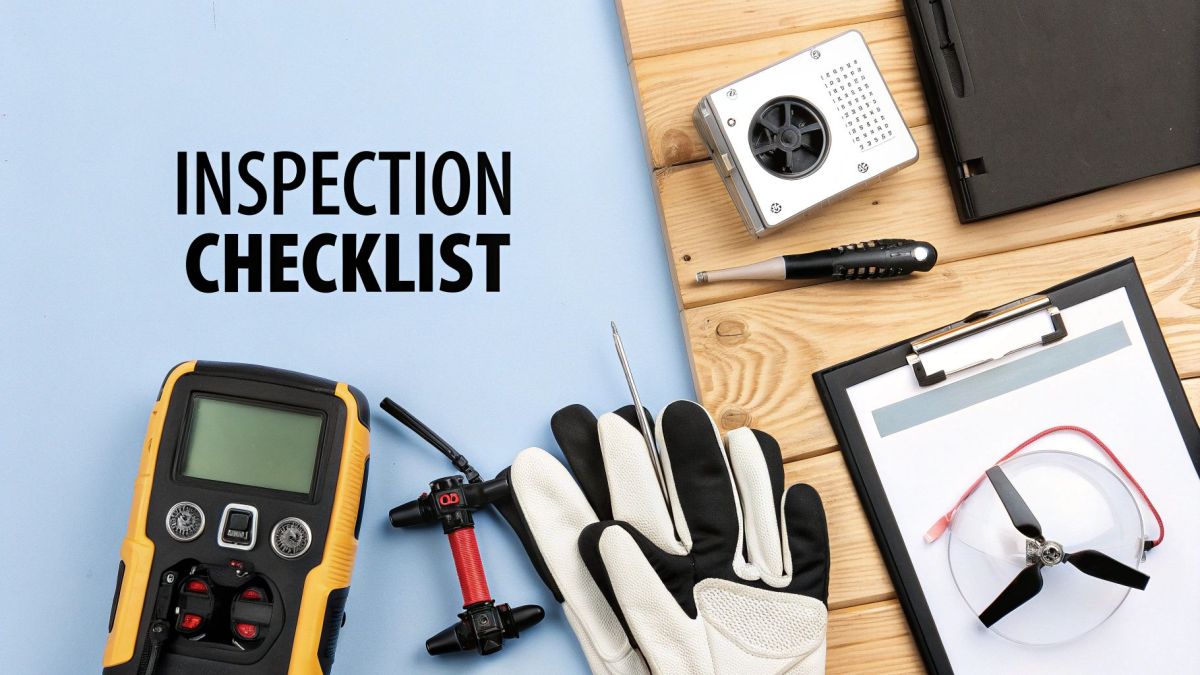
Getting your tools organised beforehand saves you from countless trips up and down the ladder. A well-stocked kit means you can handle everything from a quick visual check to more detailed diagnostic work without any frustrating delays.
- Multimeter: You can't go without this. It's essential for confirming that DC circuits are fully de-energised and for testing voltage.
- Torque Wrench: Critical for making sure all mounting bolts and clamps are tightened exactly to the manufacturer’s specs. Loose fittings are a common, and preventable, problem.
- Insulated Gloves and Tools: This is non-negotiable personal protective equipment (PPE) for any kind of electrical work.
- Drone with Thermal Camera: This has completely changed the game. It lets you spot hotspots, dodgy cells, and entire string issues from a safe distance, often before they become major failures.
Picking the Right Day
The weather has a massive impact on the quality of your inspection data. Trying to diagnose problems in the wrong conditions can lead to misleading results or cause you to miss critical faults entirely. It’s more than just an inconvenience; it’s a matter of accuracy.
For thermal imaging, you really need a clear, sunny day. The goal is to have stable solar irradiance of at least 600 W/m². This creates a strong enough temperature difference between healthy cells and faulty ones, making anomalies like hotspots pop on the thermal camera.
On the flip side, a uniformly overcast day can actually be perfect for spotting physical damage. The diffuse light cuts down on glare and reflections, making it much easier to see things like microcracks, soiling patterns, or delamination that the sun’s reflection would otherwise hide.
Timing your inspection with the weather isn’t just a nice-to-have; it's a fundamental part of getting reliable, actionable results. Once your safety checks are done, your tools are ready, and you've picked the perfect day, you're all set to get started on the hands-on assessment.
Alright, with your safety checks and gear sorted, it’s time to get hands-on with the inspection. The best place to start is actually on the ground, not on the roof. You'd be surprised how much you can learn about your system's health before you even think about climbing a ladder. A solid ground check is your first line of defence against bigger problems.
Your solar inverter is the heart and brain of the whole operation, so that's where you'll begin. Nearly all modern inverters have a screen that gives you a running commentary on performance and throws up a flag if something’s wrong.
Check the display for any flashing lights or error codes. Jot them down. These codes are your first clue, often pointing you straight to a specific panel, a wiring fault, or an issue with the inverter itself.
Scrutinising from the Ground
With your feet planted firmly on solid ground, you can get a really good overview. Grab a pair of binoculars to get a closer look and start methodically scanning the entire array, along with all the bits and pieces holding it up.
Here’s what you’re hunting for:
- Damaged Wiring: Eyeball all the conduits and wires you can see running from the panels down to the inverter. Look for any frayed sections, cracks, or signs that pests have been chewing on the casing.
- Secure Mounting: Look at where the mounting frame connects to your roof. Does it all look solid? Any sagging, loose bolts, or shifting is a major red flag that needs immediate attention.
- Debris Underneath: Peer under the panels for any buildup of leaves, twigs, or other rubbish. This stuff can trap heat, creating dangerous hotspots and becoming a fire risk.
This initial once-over from the ground makes your time on the roof far more efficient because you already know what to zero in on.
Getting Up Close on the Roof
After you’ve safely made your way onto the roof, the real detailed work begins. This is where you’ll spot the subtle signs of wear and tear that can quietly kill your energy production. Move carefully around the array, giving each panel its own individual assessment.
Pay close attention to the physical state of every module. You’re now looking for specific problems that are impossible to see from a distance.
- Cracked Glass: Even tiny hairline cracks are bad news. They let moisture seep in, which leads to corrosion and, eventually, total panel failure.
- Delamination: This is when the layers of the panel look like they're peeling or bubbling. It’s a serious defect that compromises the whole panel.
- Discolouration or "Browning": A yellowish or brownish tint can be a sign of moisture getting in or the solar cells breaking down, both of which drag down your efficiency.
- Dirt and Grime: Make a note of any serious buildup of dirt, bird droppings, or lichen. This stuff acts like a shade cloth, blocking sunlight from reaching the cells.
- New Shading: Have the trees in your yard shot up recently? Check for any new branches casting shadows over the panels during the sunniest parts of the day.
Finally, give the hardware a quick physical check. Gently but firmly wiggle the clamps holding the panels to the racking. They should be rock-solid and not show any major signs of rust or corrosion.
Stop Immediately If You See This: If you come across any exposed wires that look live, find major cracks spreading across several panels, or smell burning plastic anywhere near the inverter or junction boxes, down tools. Don't touch a thing. These are signs of a critical failure, and it's time to call a certified solar professional immediately.
Using Drones for Advanced Thermal Analysis
You can look at a solar panel all day, but you'll never see some of its most serious problems. Issues like failing bypass diodes or potential-induced degradation (PID) are completely invisible, quietly killing performance long before any physical signs show up. This is exactly where drone-based thermal imaging comes in—it lets us see the unseen.
By sending up a drone with a radiometric thermal camera, you can scan an entire solar array from a safe distance, and do it fast. Instead of climbing around on a roof for hours, the drone captures precise temperature data for every single cell. It builds a complete thermal map that makes any anomaly stick out like a sore thumb.
This diagram shows how we approach a proper solar inspection, starting with what we can see from the ground before moving up to a detailed roof analysis.
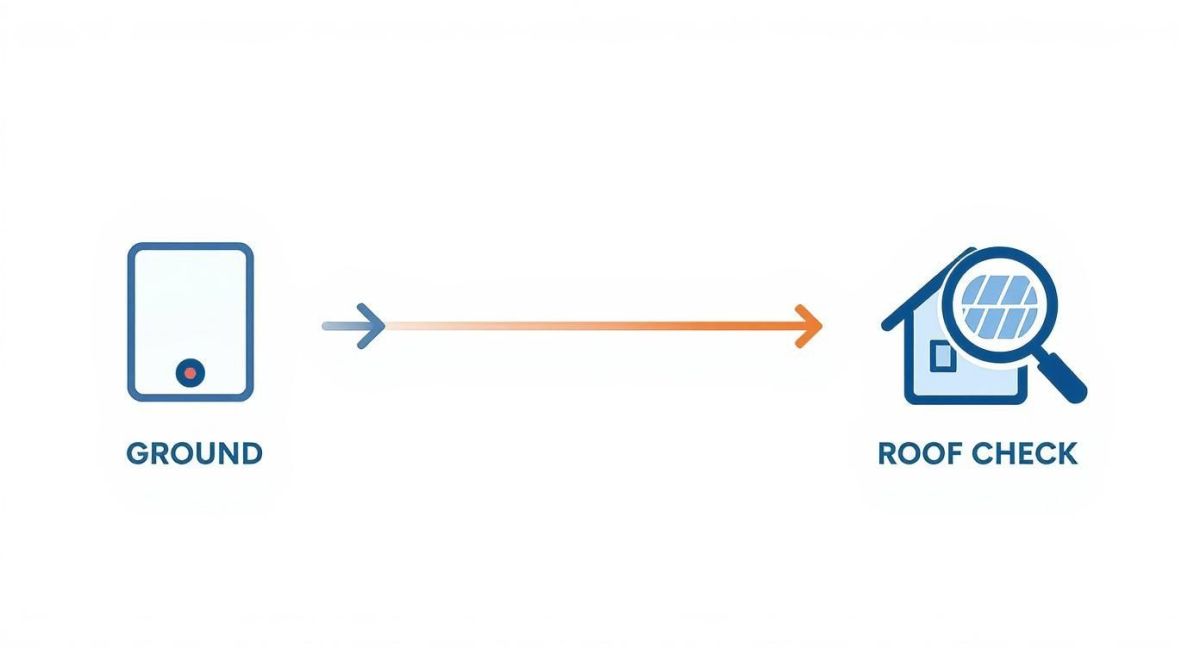
It’s all about working smart. A good look from the ground first helps make the roof inspection much more focused and efficient.
Interpreting Thermal Signatures
The thermal images are just data; the real expertise is knowing how to read them. Different heat patterns tell different stories, pointing you directly to specific faults. Once you know what you’re looking for, you can diagnose issues with incredible accuracy.
Here are a few of the common thermal signatures I see out in the field:
- Intense, Localised Hotspot: See a single cell or a small group of cells glowing much hotter than everything around them? That’s a classic sign of a failing bypass diode or an internal short circuit.
- Uniformly Cold Panel: If one panel is completely dark (cool) while the rest of the string is warm and working, it’s usually a dead giveaway for a total connection failure or maybe a blown fuse.
- A "Checkerboard" Pattern: When you spot irregular hot patches or strange diagonal heat patterns across a panel, you could be looking at PID. This is where voltage leakage is causing cells to underperform.
- Entire String is Cold: If a whole row of panels is cold, the problem is bigger than a single panel. Your first stop should be the string inverter or the combiner box to check for a fault.
When I’m analysing thermal data, I’m looking for temperature differences. An anomaly showing a temperature 20°C or more above the neighbouring cells is a massive red flag. That’s a significant fault that needs to be sorted out immediately.
From Data to Actionable Repairs
By early 2025, Australia’s installed rooftop solar capacity shot past 26 GW, spread across more than 4.1 million properties. That’s saving households around AUD 6 billion every year. With so much invested in solar, we can't afford to guess when it comes to maintenance.
This is why this kind of detailed analysis is so important. You’re no longer guessing which panel is causing the problem. You have a geo-referenced map pinpointing the exact location of every fault. You can identify the specific panel and cell, figure out the issue, and draw up a clear repair plan. For a deeper dive into how this technology works, it's worth reading up on professional thermal inspections.
Ultimately, it saves a huge amount of time and money. Technicians arrive on-site already knowing exactly where to go and what they need to fix before they even set foot on the roof.
How to Inspect Your Solar Battery System
A thorough solar panel inspection these days isn’t complete without looking at the battery system. With energy storage now a common feature in Aussie solar setups, making sure your battery is in good nick is just as crucial as checking the panels on the roof. Your battery is what gives you true energy independence, so it deserves its own check-up.
Start with a simple walk-around. Have a good look at the battery unit itself for any obvious signs of physical damage. You're looking for things like cracks, dents, or any weird bulging in the casing. These can signal internal problems, so if you spot anything, it's time to call in a professional right away.
While you're there, check the area around the battery. It’s vital that the ventilation ports are clear of dust, leaves, or anything else that might block them. Batteries create a bit of heat when they're working, and blocked vents can cause overheating, which hurts both performance and how long the battery will last.
Checking Connections and Indicators
Next, shift your focus to the battery's connections and status lights. All the wiring that runs from the battery to the inverter and your switchboard needs to be secure. Check for any visible damage or corrosion on the cables. A loose connection is a surprisingly common culprit for system issues, but thankfully, it's an easy fix.
Most modern batteries have a display screen or a set of indicator lights. See if there are any warning lights or error codes showing. These are your battery’s way of telling you something’s wrong, so don’t ignore them. Jot down any codes you see and check your user manual to figure out what they mean.
A quick visual inspection of the battery, its ventilation, and its connections can prevent 90% of the most common hardware-related failures. It’s a five-minute check that safeguards a multi-thousand-dollar asset.
Using Performance Data for a Deeper Look
The best inspection tool you have is probably already in your pocket: your battery’s monitoring app. While a visual check confirms the hardware is physically okay, the performance data tells the real story of its health and efficiency.
By mid-2025, Australia had around 271,000 solar battery units installed, a figure that doubled year-on-year. This huge growth shows just how important it is to understand your system's data to get the most out of your solar investment. You can find more solar and battery statistics on Elite Power Group's blog to see how the market is growing.
When you're in the app, make it a habit to check a few key things:
- Charge and Discharge Cycles: Is the battery charging to full and discharging like you'd expect based on your daily power use?
- State of Health (SoH): Many apps show a SoH percentage. This is a brilliant, clear snapshot of how much your battery has degraded over time.
- Performance Logs: Keep an eye out for any sudden drops in capacity or weird patterns that don't match your usual energy habits.
This data-first approach takes you beyond a simple visual check, giving you a complete picture of how your entire home energy system is performing.
Answering Your Solar Panel Inspection Questions
So, you've got the basics down, but a few questions might still be nagging you. It’s completely normal. Most people wonder how often they really need to get their panels checked, if it's something they can handle themselves, and what a fair price for a professional service looks like. Let's clear that up so you can look after your solar investment with confidence.
How Often Should I Get My Panels Inspected?
This is probably the most common question we hear. While there's no one-size-fits-all answer, a solid guideline is to book a professional inspection every 12 to 24 months. That timeframe is usually spot-on for catching any sneaky issues before they start to drag down your system's performance.
Of course, your local environment plays a big part. If you're in a place that gets hammered by dust storms, heavy snow, or even just a lot of pollen, you’ll want to lean towards a yearly check-up. And it’s always a smart move to do a quick visual check from the ground after a major event like a hailstorm, just to be safe.
Can I Just Do the Inspection Myself?
It’s a classic "yes, but…" situation. You absolutely can—and should—do your own regular visual checks. Every month or so, take a walk around and look for the obvious stuff. Is there a thick layer of grime? Has a tree branch suddenly started casting a shadow over the array? Anything that looks out of place is worth noting.
However, a proper, deep-dive inspection is a different ball game entirely. That involves getting up close and personal with live electrical systems, which is a serious safety risk if you're not trained. Specialised tasks, like using a thermal camera to spot cell defects or testing the inverter, require expensive gear and real know-how.
For anything more than a simple look-see from the safety of the ground, your best bet is to call in a certified professional. They have the right tools and training to do the job safely and thoroughly.
What's a Fair Price for a Professional Inspection?
The cost can vary a bit, but it helps to understand what you're paying for. The main factor is the size of your system—more panels simply take more time to inspect.
The type of inspection also makes a difference. A straightforward visual check will be the most affordable option, while adding services like a drone-based thermal scan will naturally cost more.
Here’s a rough guide to what you can expect to pay in Australia:
- Standard Visual Inspection: You're typically looking at $200 to $500. This should cover a thorough check of the panels, mounting racks, and all the wiring.
- Thermal Drone Inspection: This is a more advanced service and usually falls between $400 and $600. It's brilliant for finding hidden problems like hotspots and faulty cells that are invisible to the naked eye.
Try to think of a professional inspection less as a cost and more as an insurance policy for your system's output. The price is a drop in the ocean compared to the money you'll save by catching a major fault early, not to mention the lost energy production if a problem goes unchecked.
At the end of the day, investing in regular, professional check-ups is the best way to make sure your system stays safe, runs efficiently, and keeps delivering those clean energy savings for years to come.
For advanced aerial inspections that demand precision and reliability, Innoflight International provides industry-leading UAS solutions tailored for asset monitoring and infrastructure analysis. Discover our versatile drone platforms at https://evolutionflight.com.