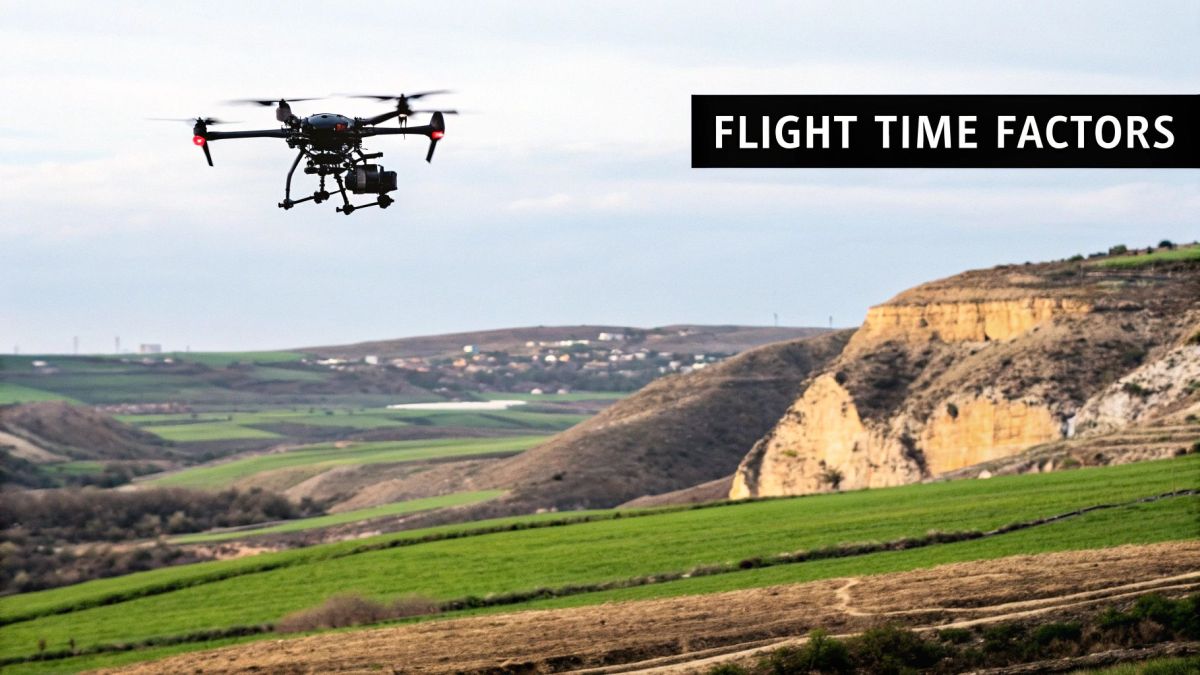
For most drones you'll see out there, whether for hobbyists or professionals, you're looking at a flight time between 20 and 45 minutes. Of course, specialised commercial drones can stay airborne for hours, but that's a different league. The key thing to remember is that this time isn't set in stone. It's constantly changing based on everything from your battery's age to how gusty the wind is, making every minute in the air precious.
Getting a handle on these factors is the first real step to getting the most out of your drone.
Why Drone Flight Duration Is So Important
Think of your drone's battery as its fuel tank. When it runs dry, you're done—whether you got the shot or not. For any pilot, drone flight duration is the hard limit on what you can do. It's the clock ticking on everything from capturing that perfect sunset to finishing a massive survey.
Just a few extra minutes of airtime can make or break a mission. For a photographer, it's the difference between catching the perfect light and missing it. For a search and rescue crew, it could mean covering that last critical grid square. You simply can't overstate how valuable it is to understand and extend your drone's time in the sky.
The Practical Impact of Limited Airtime
A short flight time isn't just an inconvenience; it creates real-world problems you have to plan around. It forces you to think about your entire workflow and what's actually achievable.
Here are a few examples from the field:
- Commercial Surveys: Imagine mapping a huge construction site. You'll almost certainly need to land and swap batteries multiple times. Each stop chews up time, breaks the flow of data collection, and opens up another chance for something to go wrong.
- Cinematic Filming: Nailing a long, flowing cinematic take requires one continuous flight. Having to land mid-shot to pop in a new battery completely wrecks the creative momentum and continuity.
- Emergency Response: When you're assessing a disaster zone or looking for a missing person, every second is critical. Longer flight times mean more ground covered without the delay of returning to home base.
Understanding the critical role of flight duration is paramount when considering the practical applications of drones. For instance, in sectors like construction, optimising airtime is essential for efficient site monitoring and progress tracking, as detailed in guides on utilizing drones for construction.
Moving Beyond Manufacturer Claims
Drone manufacturers love to advertise a "maximum flight time." But that number is always based on perfect lab conditions: zero wind, no extra weight, and a gentle, power-saving flight path. Your real-world flight time will almost always be less.
This guide is here to help you bridge that gap between the advertised specs and what you actually get. We’ll dig into the variables you can control and the ones you just have to plan for. By learning to manage your drone's power usage, you can plan your flights better, cut down on downtime, and get more done every time you take off.
How Drone Batteries Dictate Your Time in the Air
The battery is the beating heart of your drone. It’s the power source that determines every single second you get to spend in the air. To really maximise your drone flight duration, you need to get your head around its key specs, but all the technical jargon can feel a bit much. Let's break it down into simple, practical terms.
Think of your drone’s battery like the fuel tank in your car. Its capacity, measured in milliamp-hours (mAh), is simply the size of that tank. A 5,000 mAh battery holds more "energy juice" than a 3,000 mAh one, giving you the potential for longer flights. It’s that straightforward.
Then you’ve got voltage (V), which is like the fuel pressure. Higher voltage lets the motors draw power more efficiently, which is a big deal for heavy-lift drones that need extra grunt. Lastly, the discharge rate (C-rating) is how quickly you can empty that fuel tank without causing problems. A high C-rating is essential for zippy manoeuvres or fighting strong winds because it means the battery can deliver a powerful surge on demand.
LiPo vs Li-ion: The Two Main Battery Chemistries
When you look at drone batteries, you'll mainly see two types: Lithium Polymer (LiPo) and Lithium-Ion (Li-ion). They sound similar, but their internal chemistry leads to very different performance on the job, directly affecting flight time and what they’re best used for.
- Lithium Polymer (LiPo): Think of these as the sprinters. LiPo batteries are the go-to for most consumer and professional drones because they have a high discharge rate. This means they can deliver big bursts of power quickly—perfect for acrobatic flying or punching through a sudden gust of wind. The trade-off? They usually have a lower energy density, so they don't pack as much power for their weight.
- Lithium-Ion (Li-ion): These are the marathon runners. Li-ion batteries, often made up of cylindrical cells like the 18650 or 21700, boast a much higher energy density. They can pack more power into the same amount of weight, making them the top choice for long-endurance flights where steady, sustained power is far more important than sudden acceleration.
For most high-performance photography or surveying drones, LiPo is the standard. But for specialised jobs like long-range mapping or surveillance, the incredible drone flight duration you get from Li-ion packs makes them the clear winner.
A well-maintained battery is a reliable one. Consistently following proper charging and storage protocols can extend a battery’s effective service life by up to 50%, translating directly into more consistent and predictable flight times over hundreds of cycles.
Actionable Tips for Maximum Battery Performance
Getting the most out of your batteries isn't just about buying the biggest one you can find; it's about smart management and care. Looking after them properly not only extends your immediate flight time but also protects your investment by prolonging the battery's overall lifespan. For a deeper dive, our guide on maximising drone battery life covers even more detailed strategies.
Here are a few essential practices you can start using today:
- Avoid Full Depletion: Never, ever fly your battery down to 0%. Aim to land with 15-20% remaining. This is a safe buffer that prevents permanent cell damage and ensures you have enough juice for an unexpected delay or a go-around.
- Proper Storage Charge: If you’re not planning to fly for more than a couple of days, don't leave your batteries fully charged or completely dead. Most smart chargers have a "storage" mode that brings them to around 50-60% charge (about 3.8V per cell), which is the sweet spot for their long-term health.
- Charge Before You Fly: For the best performance, get into the habit of charging your batteries within 24 hours of your planned flight. Leaving them at 100% for days on end can slowly degrade their capacity.
- Mind the Temperature: Batteries hate extreme hot and cold. Avoid charging a battery right after a flight when it’s hot or if it's been sitting in a cold car. Always let it get back to room temperature first to ensure a safe and efficient charge.
How Weight and Payloads Cut Into Your Flight Time
Every single gram you add to your drone takes a bite out of its flight time. It’s a simple trade-off. Think about going for a run – you're much faster and can go for longer in shorts and a t-shirt than you would be wearing a heavy backpack. For a drone, that backpack is its payload, and the "energy" it drains is precious battery life.
It all comes down to physics. To stay in the air, a drone’s motors have to generate enough lift to overcome gravity. The heavier the drone, the harder those motors need to work. They have to spin faster, which pulls a lot more power from the battery.
This effect isn't a one-to-one relationship, either. Adding just 10% more weight can force the motors to work 20% harder just to maintain a stable hover. That extra power draw is what chews through your battery, turning a manufacturer's 30-minute advertised flight time into a 20-minute reality out in the field.
The Real Cost of Adding Equipment
Your drone’s total weight is its base weight (the aircraft and battery) plus its payload. A payload is anything extra you attach, whether it's a high-resolution camera for a film shoot or a sophisticated LiDAR scanner for creating detailed maps. These tools get the job done, but they always come at the cost of airtime.
Let’s look at a common example. A standard DJI or Autel drone might hit its advertised 35-minute flight time when it’s only carrying its built-in camera. But what happens when you start adding professional gear?
- Professional Cinema Cameras: Strapping on a heavier camera and gimbal for better image quality can easily shave 10–15 minutes off your flight.
- LiDAR or Multispectral Sensors: These bulky, powerful sensors used in agriculture and surveying can slash your endurance by 30-50%, sometimes even more.
- Accessory Mounts and Guards: Even small additions like prop guards, landing gear extensions, or GPS trackers add up. Each one chips away at your total time in the air.
The trade-off is always there: more capability for less endurance. Getting your head around this is the first step to planning successful missions. You have to ask yourself if the data from that heavier sensor is worth the shorter flight and the hassle of extra battery swaps.
Planning for Your Payload
Understanding this balance is crucial for professional operators, where a mission’s success hangs on careful planning. Here in Australia, industries like emergency services and agriculture are relying more and more on drones. Projections show that by 2043, emergency services will be conducting over 300,000 drone flights a year, while farmers will be carrying out around 500,000 annually for tasks like crop monitoring. These operations often involve heavy, specialised payloads, making flight time calculations essential. You can learn more about Australia's expanding drone usage and what it means across different sectors.
To manage this, you should always know your drone’s All-Up Weight (AUW) before you take off. That's the total weight of everything: the drone, battery, and whatever payload you've mounted.
Before every flight, run through this mental checklist:
- Is everything on here essential? If a mount or accessory isn't needed for this specific job, take it off.
- Is there a lighter option? Sometimes a more compact sensor or a smaller lens can still get you the results you need without such a big hit to your flight time.
- How does this affect my return-to-home setting? A heavy drone needs more juice to get back, especially if it’s fighting a headwind. You might need to be more conservative and set your low-battery warning to 30% instead of the usual 20% to guarantee a safe landing.
By treating weight as a key flight parameter, you'll make smarter choices, plan more realistic missions, and avoid the dreaded surprise of a battery draining way faster than you expected.
Navigating Environmental Factors That Drain Your Battery

While you can control things like payload and how you fly, the environment is the one variable you can’t tame. It's constantly throwing challenges at your drone's battery, and these external conditions can slash your drone flight duration when you least expect it. Knowing how to read the conditions and fly smart is what separates a successful mission from a stressful one.
Ever tried paddling a kayak up a fast-moving river? You have to dig in hard just to stay put. Flying a drone into a strong headwind is exactly the same. The motors have to spin like crazy just to hold their ground, which absolutely hammers the battery.
This constant battle with the wind pushes the motors and electronic speed controllers (ESCs) to their limits. You’ll see a massive drop in efficiency, sometimes cutting your flight time by 30-50% compared to a calm day. That’s why checking the weather forecast—especially wind speed and direction—is a non-negotiable part of any pre-flight plan.
Battling the Cold and Heat
Temperature has a bigger impact on your battery than you might think. Extreme cold and scorching heat are both enemies of the chemical reactions happening inside your drone’s LiPo cells.
When it gets cold, the chemistry inside the battery slows right down. This makes it harder for the battery to deliver power, leading to a drop in voltage. Your drone might read this as a nearly empty battery—even if there’s plenty of juice left—and trigger an early and unnecessary return-to-home command.
The easy fix? Keep your batteries warm before you fly. An insulated bag or even the inside pocket of your jacket will do the trick until you’re ready to take off.
Pro Tip: Never charge a freezing-cold battery right after a flight. Let it warm up to room temperature first. Charging a cold battery can cause permanent damage, reducing its overall lifespan and how much charge it can hold.
Hot weather is just as bad. Flying under the harsh Australian sun can cause batteries to overheat. This not only damages them over the long term but can also trigger a safety shutdown in the middle of a flight. Keep an eye on the battery temperature in your flight app and bring the drone in for a landing if it gets too high.
High Altitude and Thin Air
Altitude is another environmental factor that quietly eats away at your drone flight duration. As you go higher, the air gets thinner. This means there are fewer air molecules for the propellers to grab onto and push against to create lift. It's like trying to swim in really thin, watery soup—you have to work much harder to get anywhere.
To make up for the thin air, the drone’s motors have to spin much faster just to generate the same lift they would at sea level. More RPMs means more power draw, and that means shorter flight times.
If you’re flying in mountainous areas or at high elevations, you need to factor this in. Here’s what you’re up against:
- Reduced Lift: Motors have to work harder just to hover and climb.
- Lower Efficiency: You’re burning through more energy every minute you’re in the air.
- Shorter Flight Times: A drone that gets 30 minutes at sea level might only manage 20-22 minutes at altitude.
When planning for flights in these environments, it pays to be cautious. Set your low-battery warnings a bit higher than usual and always leave yourself a generous safety margin to get back home.
How Your Flying Style Affects Drone Endurance
How you fly your drone directly impacts how long it stays in the air. It’s a lot like driving a car—if you’re constantly speeding up and slamming on the brakes, you’ll burn through a tank of petrol much faster than someone cruising smoothly down the motorway. The very same idea applies to your drone's battery. Every move you make on the sticks determines your total drone flight duration.
Aggressive flying is a massive power drain. When you make sharp turns, climb rapidly, or stop on a dime, you’re forcing the motors to work overtime and pull a huge amount of current from the battery. This is great fun for FPV (First-Person View) racing, but for most professional jobs, it’s a surefire way to cut your flight short.
Different Missions, Different Flight Styles
Every job requires a unique approach to flying, and each style has its own energy signature. If you understand these differences, you can adapt how you fly to fit the task at hand, squeezing every last drop of power out of your battery when you need to maximise your time in the air.
Let's look at a few common ways to fly:
- Aggressive & Acrobatic: Think high-speed manoeuvres, constant throttle changes, and quick directional shifts. It's a thrill, but it’s also the least efficient way to fly and can easily slash your flight time by 30% or more.
- Static Hovering: You’d think hovering would be easy on the battery, but it's surprisingly demanding. The motors have to constantly battle gravity just to stay in one spot, without any forward momentum to help generate lift. A drone often burns more power hovering than it does flying slowly forward.
- Cinematic Sweeps: This is all about smooth, controlled, and deliberate movements. By holding a steady, moderate speed and avoiding any jerky inputs, you keep the motors operating in their sweet spot, which can seriously extend your flight time.
A drone’s motors are at their most efficient when flying forward at a steady speed, usually around 25-35 km/h. At this pace, the drone gets a bit of help from aerodynamic lift, which means the motors don't have to work as hard just to keep it airborne. This is the magic speed for getting the most range out of your drone on long-distance jobs.
Practical Ways to Fly Smarter and Longer
Becoming a more efficient pilot really just comes down to being more deliberate with your controls. A smoother flying style can easily add precious minutes to every flight, giving you more time to get the perfect shot, finish a survey, or just make it back home safely.
To get the most out of each battery, try these simple techniques:
- Ease Up on the Throttle: Instead of jamming the throttle stick upwards to gain height, apply power smoothly and gradually. Gentle ascents and descents are far kinder to your battery. This also reduces the strain on your propellers, which have to spin faster to generate more lift. You can even use online tools to calculate propeller thrust to see how this works.
- Keep Your Speed Consistent: Plan your flight path to include long, straight sections where you can maintain a steady speed. Constantly stopping, starting, and turning forces the motors to fight inertia over and over again, which chews through your battery.
- Use the Wind to Your Advantage: When planning your flight home, check the wind direction. Flying back with a tailwind is like getting a free push, and it takes a significant load off your motors.
- Don't Just Hover: If you need a moment to re-think a shot or adjust your camera settings, it’s often better to fly in a slow, wide circle than to just sit and hover in one place.
By mastering these simple habits, you can take active control over your drone's power consumption. You'll be able to turn what could have been a short flight into a far more productive and less stressful time in the air.
Putting Real-World Drone Flight Times to the Test
Ever noticed the number on the box rarely matches the time you get in the air? There’s often a big gap between a drone's advertised flight time and how it actually performs out in the field. That’s because manufacturers test their drones in perfect, lab-like conditions—think no wind, no extra weight, and a steady, power-sipping flight path.
This is exactly why a drone marketed with a 40-minute flight time might only give you closer to 30 minutes in a typical real-world scenario.
Getting your head around this difference is crucial for managing expectations and planning missions that don't end with a last-minute scramble to land. Every little thing, from a light breeze to an extra sensor, nibbles away at that maximum advertised number. A solid, realistic estimate for most consumer and professional drones is usually around 70-80% of what the manufacturer claims.
From the Box to the Back Paddock: What to Really Expect
Let's look at some popular models you'll see flying around Australia. Drones like the DJI Mavic 3 Pro and Autel EVO II Pro are common choices for good reason, boasting some pretty impressive specs. On paper, they offer maximum flight times of around 40 to 43 minutes and a control range stretching up to 15 kilometres.
Of course, then you have the specialised, long-endurance beasts like the JOUAV CW-30E VTOL, which can stay airborne for a massive 480 minutes. But these are generally reserved for serious industrial or military work, not your average weekend flight.
The trick is to mentally adjust those impressive figures for real-world flying. Adding a payload, fighting against moderate winds, or performing lots of sharp manoeuvres will noticeably cut down the actual drone flight duration you get.
As a simple rule of thumb, I always suggest knocking at least 10 minutes off the advertised maximum flight time. This easy adjustment gives you a much safer and more realistic baseline for planning your return-to-home time and overall mission.
The chart below gives a great visual breakdown of the average flight times you can expect from different classes of drone batteries under normal conditions.
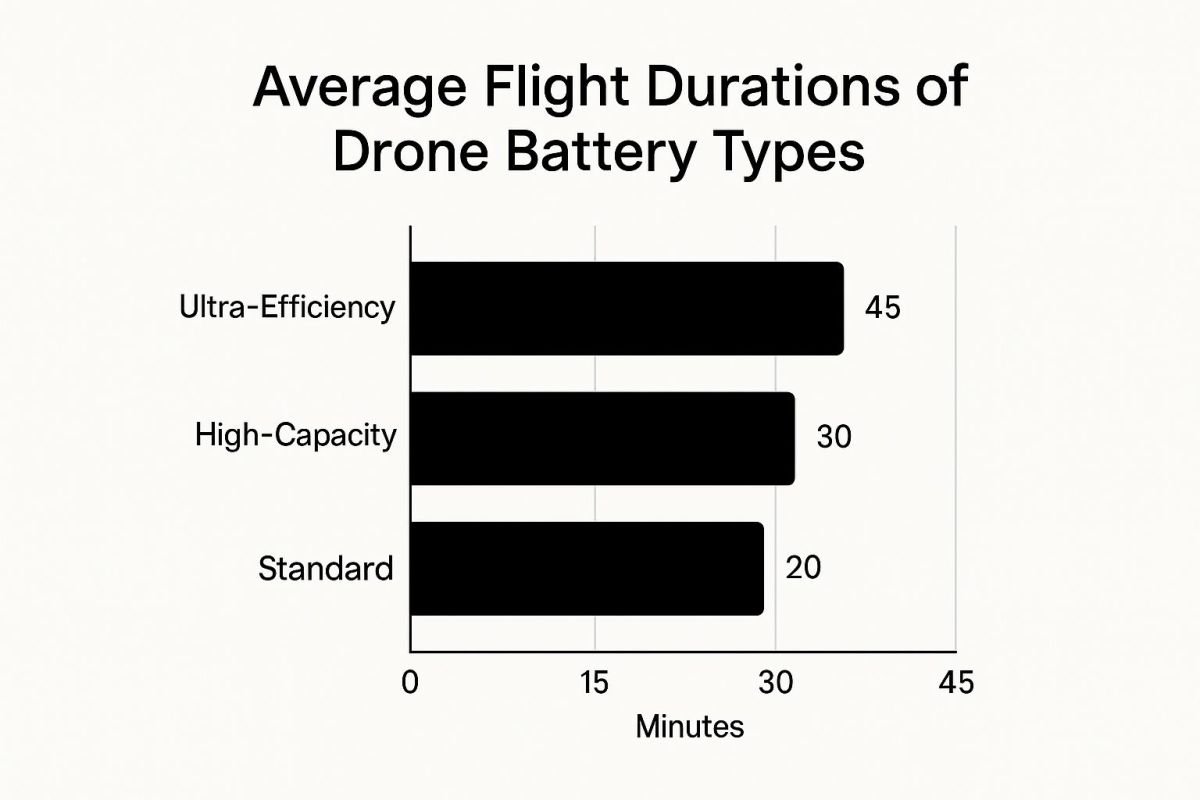
It’s pretty clear from this that an investment in higher-capacity or more efficient batteries really does pay off with a substantial boost in potential airtime.
Real-World Flight Duration for Popular Drone Models
To make this even clearer, let's compare what the manufacturers say versus what pilots actually experience with some of today's most common drones.
| Drone Model | Advertised Max Flight Time (minutes) | Realistic Flight Time (minutes) | Common Use Case |
|---|---|---|---|
| DJI Mavic 3 Pro | 43 | 30-35 | Aerial photography, videography |
| Autel EVO II Pro | 40 | 28-32 | Inspection, mapping, creative content |
| DJI Mini 4 Pro | 34 | 25-28 | Hobbyist flying, travel vlogging |
| DJI Matrice 30T | 41 | 30-34 | Public safety, industrial inspection |
As you can see, once you account for real-world variables like wind, flight manoeuvres, and a safety buffer for landing, the usable flight time is consistently lower than the marketing figures.
Matching Flight Time to the Mission
The drone market has something for everyone, and flight times are tailored to different needs. It helps to think about them in categories to see how their endurance lines up with their job.
-
Consumer & Prosumer Drones: This is where you'll find favourites from DJI's Mavic series and Autel's EVO line. They strike a fantastic balance between portability, camera quality, and flight time, with realistic flights typically lasting 25 to 35 minutes.
-
Enterprise & Commercial Drones: Workhorses like the DJI Matrice series are built for tough industrial jobs. While their flight times might seem similar to prosumer models, they're designed to carry heavier, more complex gear like thermal cameras or LiDAR scanners, which has a big impact on their endurance.
-
Long-Endurance Fixed-Wing Drones: When you need to cover huge areas for mapping or conduct long-range surveillance, fixed-wing or VTOL (Vertical Take-Off and Landing) drones are the go-to. Their plane-like design is far more efficient, allowing them to stay in the air for one to several hours and survey vast tracts of land in a single flight.
At the end of the day, picking the right drone means looking beyond the number on the box. You need to think hard about how you’ll actually be using it. Once you understand the factors that drain a battery, you can make a much smarter choice and plan your flights with real confidence.
Common Questions About Drone Flight Duration
Even when you've got a good handle on what affects your drone's air time, a few practical questions always pop up. Let's tackle some of the most common queries I hear from pilots, giving you clear, simple answers to help you fly with more confidence.
Accurately Predicting Your Flight Time
So, how can you know exactly how long your drone will stay in the air for a specific mission before you even launch?
A solid rule of thumb is to knock 25-30% off the manufacturer's advertised flight time right away. That gives you a much more realistic baseline. From there, you have to consider the payload you're carrying and how windy it is on the day.
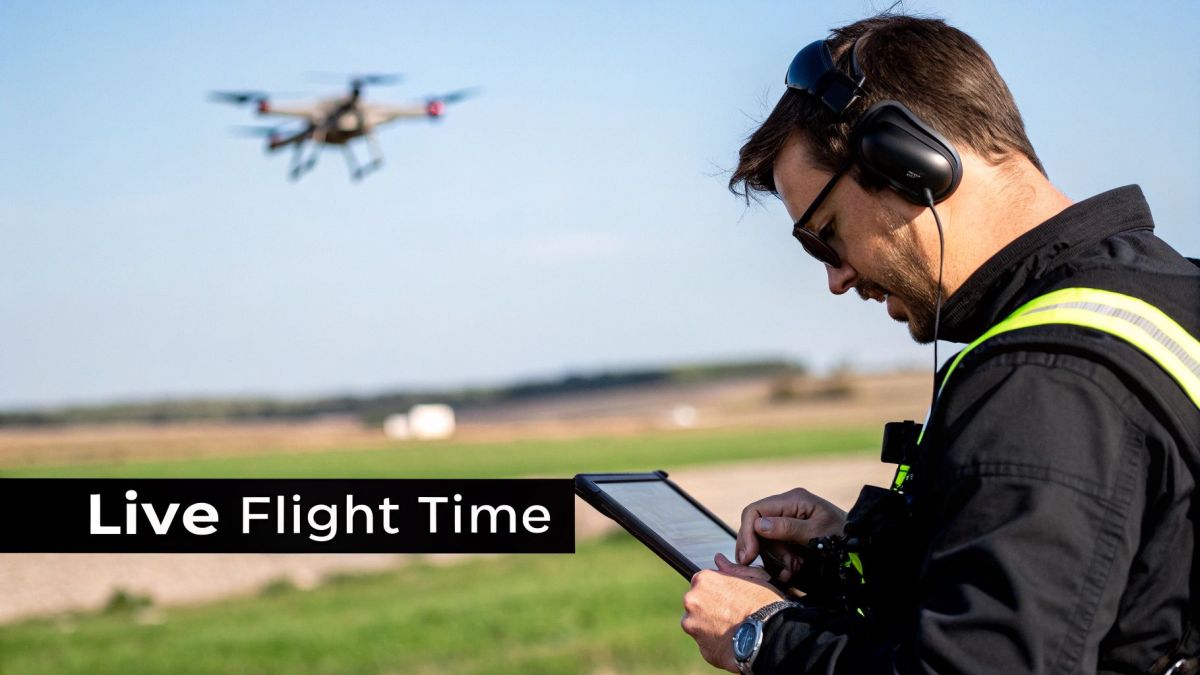
For really important flights, here's a great little trick: do a quick test hover for a minute or two. Watch how fast the first 10% of your battery drains. This gives you a real-world idea of what to expect for that specific flight. Plus, most modern drone apps feed you live data, helping you learn the unique quirks of your drone's performance over time.
The Myth of Lighter Propellers
Will using lighter propellers actually give you more flight time? The short answer is: not really. While it's true that less weight is generally better, the propeller's efficiency is what truly matters, not just its weight.
Lighter props might seem like an easy win, but if they're not designed well, they'll be less efficient at creating thrust. This forces your motors to spin faster and work harder, which just burns through your battery quicker. You're almost always better off sticking with the high-quality propellers that the manufacturer designed specifically for your drone's motors and weight.
Crucial Safety Warning: Never, ever fly your drone until the battery hits 0%. It’s incredibly dangerous and will permanently damage your battery. Always plan to land with at least 15-20% left in the tank as a non-negotiable safety buffer.
The Risk of Flying to Zero Percent
Trying to squeeze every last second out of a battery by flying it to empty is just asking for trouble. Most drones are smart enough to trigger an automatic 'Return to Home' (RTH) when the battery hits around 25%.
Ignoring these warnings and pushing a LiPo battery for your drone to absolute zero can cause permanent damage to the battery cells. This drastically shortens its lifespan and hurts its performance on all future flights.
Beyond damaging your gear, it's just unsafe. Authorities like Australia's Civil Aviation Safety Authority (CASA) have strict rules for a reason. These regulations, which include not flying near airports or over people, are all about keeping everyone safe. You can learn more about safe drone operations in Australia to make sure you're always flying by the book.
At Innoflight International, we build advanced unmanned aerial systems designed for maximum endurance and reliability. If your operations demand longer flight times and heavy-lift capabilities, explore our versatile drone solutions at https://evolutionflight.com.