Before your drone's propellers even start to spin, the success of your aerial survey is already being decided. Professional UAV aerial survey work isn't just about getting up in the air; it's a meticulous process where everything you do before the flight sets the stage for the quality and accuracy of your final data. This is where you lay the groundwork for a reliable, high-quality outcome.
Planning Your UAV Survey for Success

From my experience, the best missions are won long before you get to the site. Solid planning turns a simple flight into a precision data-gathering operation, making sure every single image captured is a valuable piece of the puzzle. It’s less about the tech and more about strategy, foresight, and paying close attention to the small details.
This strategic thinking is more important than ever, especially with the drone industry booming here in Australia. In 2024, the market's economic value hit AUD 619.9 million, and it's projected to grow by an incredible 27% each year, reaching AUD 2.76 billion by 2034. This growth is being fired up by industries like mining, construction, and agriculture hungry for quality aerial data. You can dig deeper into these numbers in this detailed market analysis.
Define Clear Project Goals
First things first, what are you actually trying to achieve? Your project's core objective will shape every decision you make, from the gear you pack to the flight parameters you set. Are you tracking stockpile volumes at a mine, mapping topography for a new housing estate, or checking crop health for a farmer? Each job has its own unique demands.
A volume calculation, for example, needs incredibly precise vertical data. On the other hand, a simple orthophoto for a real estate brochure might just need to look good, with absolute accuracy being less of a concern.
Pinning down your deliverables right at the start is a game-changer. Knowing if the client needs a 3D point cloud, a digital elevation model (DEM), or a high-res orthomosaic will guide your entire workflow from capture to processing.
Conduct Thorough Site Reconnaissance
Before you even think about packing the car, you need to do your homework online. Use tools like Google Earth and CASA's drone safety maps to get a feel for the area and spot any red flags. Be on the lookout for:
- Obstacles: Things like power lines, tall trees, phone towers, or nearby buildings that could get in your way.
- Airspace Regulations: Check if you're operating near controlled aerodromes, in restricted zones, or close to helicopter landing sites.
- Terrain: Make a note of any big hills or valleys. Major changes in elevation will mess with your flight altitude and your Ground Sampling Distance (GSD).
If you can, getting boots on the ground for an on-site visit is always a good idea. Walking the area helps you spot hazards you’d never see on a map, find the safest spots to take off and land, and figure out the best places to lay your Ground Control Points (GCPs) so they have a clear view of the sky.
Build a Detailed Flight Plan
Alright, you’ve got your goals locked in and you know the site like the back of your hand. Now it's time to build the mission plan. This is where you use specialised software to turn your project goals into a set of technical flight instructions for the drone. If you're weighing up your options, we've put together a guide to help you find the best UAV flight planning software for the job.
Here are the key parameters you'll need to lock in:
- Flight Altitude: This has a direct effect on your GSD (Ground Sampling Distance), which is the real-world size of one pixel in your photos. Flying lower gives you a smaller GSD and a sharper image, but it also means more flight time and batteries to cover the same patch of ground.
- Image Overlap: A good rule of thumb to start with is 80% front overlap and 75% side overlap. This redundancy is crucial; it gives the photogrammetry software plenty of common points between photos to stitch everything together without gaps or distortions.
- Camera Settings: Get these right from the start. Lock your focus to infinity and choose a fixed shutter speed fast enough to prevent motion blur. Your aperture and ISO should be set manually based on the light to keep the exposure consistent across the entire flight.
- Ground Control Points (GCPs): Don't just scatter them randomly. Plan where your GCPs will go. You want them spread evenly around the edges of your survey area with at least one in the middle. This network of points with known coordinates is the key to georeferencing your map and hitting that survey-grade accuracy.
Choosing the Right Drone and Sensor for the Job
The quality of your survey data comes down to one thing: flying the right gear. Picking the best drone and sensor for your project isn't just a tech-spec exercise; it's the most important decision you'll make in the field. Get it right, and the project runs smoothly. Get it wrong, and you’re wasting time and money before you even get off the ground.
It’s really about matching the tool to the task. You wouldn't use a sledgehammer for delicate work, and the same logic applies here.
Think of a multi-rotor drone as your scalpel. It’s perfect for detailed, close-quarters jobs like inspecting a building facade or mapping a small, tricky construction site. Their ability to hover and manoeuvre in tight spaces lets you capture incredible detail from every conceivable angle.
A fixed-wing drone, on the other hand, is your workhorse for big jobs. If you're mapping a 500-hectare farm or a long pipeline corridor, a fixed-wing is the only sensible choice. It's built for endurance and covering huge areas efficiently.
Multi-Rotor vs. Fixed-Wing Drones
The big question—multi-rotor or fixed-wing?—boils down to a classic trade-off: agility versus endurance.
Multi-rotors, like your typical quadcopter, are incredibly stable and can carry a huge range of sensors, making them super versatile. Their biggest limitation is battery life. You're usually looking at 30-45 minutes in the air before you have to land and swap batteries.
Fixed-wing drones are the marathon runners. Because their wings generate lift, they are far more energy-efficient than a multi-rotor that's constantly fighting gravity. This translates into much longer flight times, often over an hour, letting them cover vast distances in a single flight. This is a huge reason we've seen them take off in Australian agriculture and large-scale land surveys. For more on this, check out this overview of the Australian UAV market.
When you're making the call, ask yourself these questions:
- How big is my site? Constant battery swaps with a multi-rotor on a large site will chew through your day.
- What am I carrying? A heavy, high-end LiDAR scanner might need the brute lifting power of a powerful multi-rotor.
- What’s the weather like? Fixed-wings generally handle windy conditions much better—a massive plus for flying in many parts of Australia.
- Where can I take off and land? A multi-rotor can lift off from a two-metre clearing. A fixed-wing needs a clear runway or launch catapult, plus a safe spot for a belly landing.
Matching the Sensor to Your Survey Goal
Once you've picked your drone, you need to decide what data it's actually going to collect. The sensor is the entire point of the mission. The best drone pilot in the world can't fix a survey flown with the wrong sensor.
The main types each have a specific job:
- RGB Cameras: These are your standard high-resolution cameras, the bread and butter of photogrammetry. They capture the visual data used to build stunning 3D models and high-res orthomosaics, making them perfect for topographic mapping and tracking progress on a construction site.
- Multispectral Sensors: These are the secret weapon for precision agriculture. They see light in specific bands the human eye can't, like near-infrared, giving you incredible insight into crop health, water stress, and nutrient levels.
- LiDAR (Light Detection and Ranging): When you absolutely need the most accurate terrain model possible, you need LiDAR. It shoots laser pulses to the ground and measures the return, creating a precise point cloud of the surface. Its superpower is punching through vegetation to map the true ground level, something photogrammetry just can't do reliably.
At the end of the day, your choice should be dictated by the final deliverable. If the client needs a Digital Terrain Model (DTM) of a dense forest, LiDAR is the only tool for the job. If they just need a high-quality visual record of a worksite, a great RGB camera is all you need.
To help you get started, here’s a quick guide to pairing the right gear with common survey jobs here in Australia.
Matching Drones and Sensors to Your Survey Project
Choosing the right combination of UAV and sensor from the start is crucial for efficiency and data quality. The table below outlines some common survey applications and the gear I'd typically recommend based on my experience in the field.
| Application | Recommended UAV Type | Recommended Sensor | Key Considerations |
|---|---|---|---|
| Construction Site Mapping | Multi-Rotor | High-Resolution RGB | You need high detail and the flexibility to capture vertical surfaces. Manoeuvrability is everything. |
| Broad-Acre Crop Scouting | Fixed-Wing | Multispectral | The goal is to cover massive areas quickly to create plant health maps (like NDVI). Endurance is the top priority. |
| Mining Stockpile Volumes | Multi-Rotor | High-Resolution RGB or LiDAR | Accuracy is non-negotiable. LiDAR gives the best results, but well-controlled photogrammetry can also be very effective. |
| Vegetation Penetration Survey | Multi-Rotor or Fixed-Wing | LiDAR | Your main objective is mapping the ground under a tree canopy. Only LiDAR can do this properly. |
| Corridor Mapping (Road/Rail) | Fixed-Wing | High-Resolution RGB or LiDAR | The long flight times of a fixed-wing are perfect for linear projects, meaning fewer flights and less hassle. |
This table is a starting point, of course. Every project has its own unique challenges, but this should give you a solid foundation for making your equipment decisions.
Executing Flawless Data Capture in the Field
With all the groundwork laid, it’s time to head out to the site and put your plan into action. This is the stage of a UAV aerial survey where meticulous preparation really pays off. Flawless data capture isn’t about being perfect; it’s about being systematic, adaptable, and sticking to a workflow you trust.
The moment you arrive on-site, your first priority is safety and setup. Before you even think about unpacking equipment, do a quick site walk-through. You need to confirm conditions haven't changed since your initial visit. I'm talking about looking for new obstacles, changed ground conditions, or any unexpected site activity.
Setting Up for Success On-Site
First things first, establish a secure launch and recovery zone (LRZ). This area needs to be flat, clear of debris, and well away from people, vehicles, or overhead hazards like power lines. Think of this as your operational hub—it's where you'll set up your ground station, assemble the drone, and manage your batteries.
Once your LRZ is sorted, your next crucial task is placing the Ground Control Points (GCPs). These physical markers are the absolute bedrock of your survey's accuracy. They act as the bridge between the digital data your drone collects and its precise location on Earth.
To hit that centimetre-level accuracy we're all after, your GCPs must be:
- Highly Visible: They need to contrast sharply with the ground so they're dead easy to spot in the aerial images.
- Evenly Distributed: Spread them right across the survey area, covering the perimeter and dropping at least one point near the centre. This creates a strong geometric network for the processing software to lock onto.
- Precisely Measured: Use a survey-grade GNSS rover to record the exact coordinates of the centre of each GCP. I always recommend spending 5-10 seconds averaging the position for each point to ensure you get a stable, accurate reading.
This infographic gives a simple comparison of the two main types of UAVs you'll be using for aerial surveys.
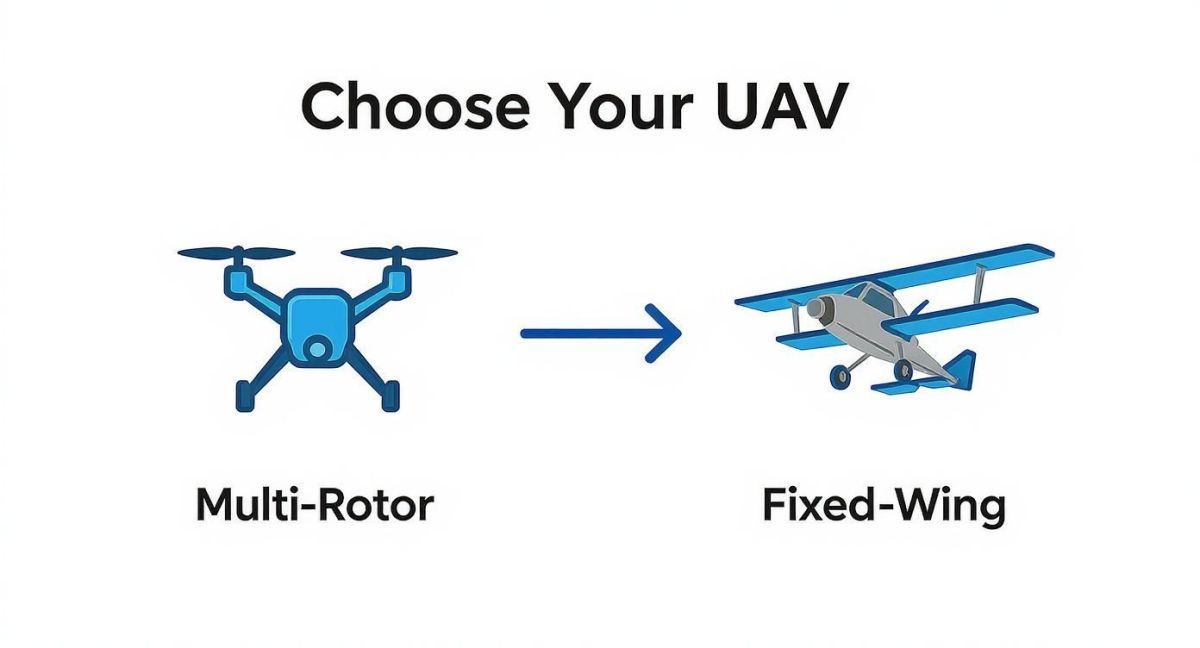
Whether you choose a multi-rotor or a fixed-wing drone will directly impact how you approach your fieldwork, from flight endurance all the way through to your launch and recovery procedures.
The Pre-Flight Checklist and Mission Monitoring
With your ground control in place, it’s time to get the aircraft ready. A thorough pre-flight check is non-negotiable. Don’t just glance over it—work through each item methodically. This means checking propellers for damage, verifying battery levels for both the drone and controller, and making sure the sensor is clean and properly calibrated.
Before launching, always double-check that your drone is receiving corrections from your base station. A stable 'FIX' solution is the difference between capturing precise, georeferenced images and collecting data that’s effectively useless for survey purposes.
For anyone looking to achieve this high level of precision, understanding the tech behind it is key. You can learn more about how RTK works and why it's so important in our comprehensive guide on what is RTK GPS. This system is essential for locking in the accuracy required for professional survey work.
Once the automated mission is launched, your job shifts from pilot to mission monitor. You must maintain a visual line of sight with the drone at all times. On your ground station controller, keep a close watch on key telemetry data:
- Flight Path: Is the UAV accurately following the pre-planned flight lines?
- Battery Voltage: Keep a sharp eye on power levels to ensure a safe return.
- GPS/RTK Status: Watch for any loss of satellite lock or RTK connection.
- Environmental Conditions: Be ready to intervene if the wind picks up suddenly or if rain starts.
Unexpected things happen in the field. If a vehicle enters your survey area or a bird gets a bit too curious, be prepared to pause the mission, bring the drone to a safe hover, and only resume when the hazard has passed.
Post-Flight Essentials
The mission isn't truly over when the drone lands. Your immediate post-flight actions are just as important for guaranteeing data integrity and avoiding a costly re-flight.
As soon as the drone is safely on the ground, secure your data. Pull the SD card and immediately create at least two backups of the raw imagery on separate devices. A ruggedised laptop and an external hard drive are a good combination.
Before you start packing up, perform a quick on-site quality check. Flick through a random sample of the images to check for blurriness, exposure issues, or any obvious gaps in coverage. A few minutes of review in the field can save you a full day of returning to site if you discover a problem back at the office. This final check gives you the peace of mind that you're leaving with a complete, high-quality dataset.
Turning Raw Drone Data into Actionable Insights
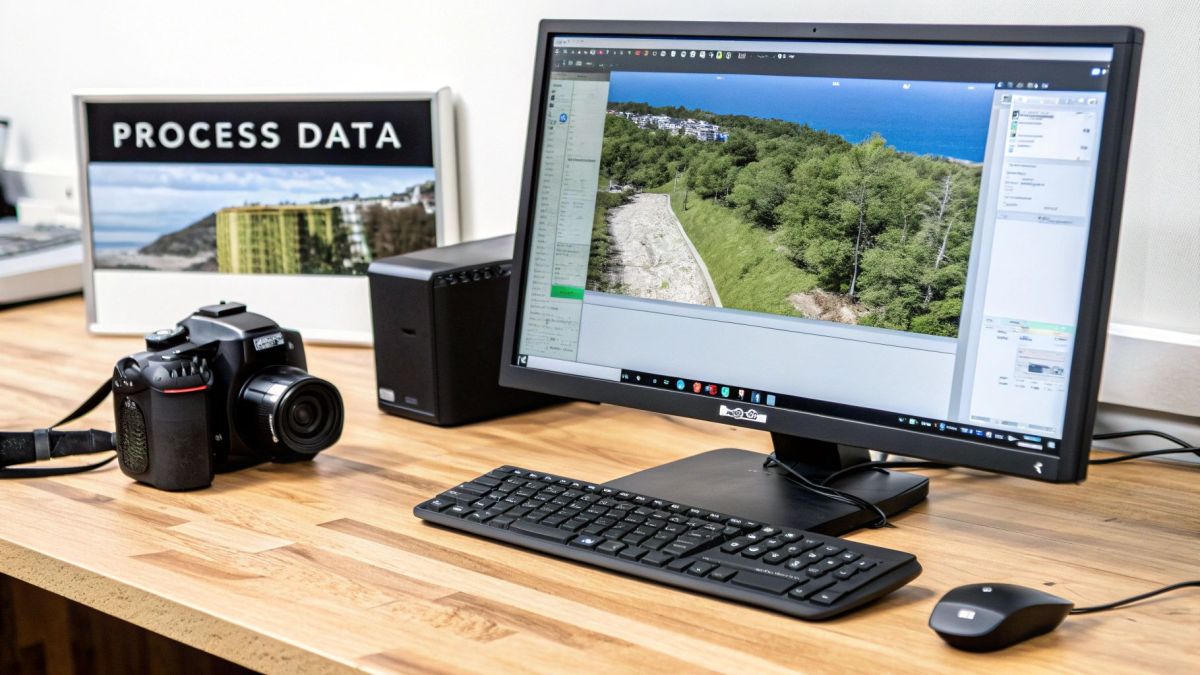
Flying the drone is the fun part, but the real value of a UAV aerial survey is unlocked back at the office. This is where the magic happens—transforming hundreds, or even thousands, of individual photos into precise, measurable intelligence. We call this photogrammetry.
Essentially, we take the raw ingredients from the field—geotagged images and precise Ground Control Point (GCP) data—and feed them into powerful software. The result is an incredibly detailed 2D map or 3D model. It’s a demanding process, but knowing how it works is vital if you want to deliver professional-grade results.
The Photogrammetry Workflow Demystified
Getting from a memory card full of photos to a final model is a logical journey. It all starts with the software meticulously finding common features across overlapping images. This first step, called aerial triangulation, builds a geometric framework that figures out exactly where each photo was taken in relation to all the others.
From there, the software generates a dense point cloud. Think of it as a massive digital cloud made of millions of individual points, each with its own precise X, Y, and Z coordinate. This becomes the raw, three-dimensional skeleton of your entire survey area.
- Aerial Triangulation: The software identifies thousands of matching "tie points" between images to stitch them all into a cohesive block.
- Point Cloud Generation: It uses these tie points to build a dense 3D cloud, which forms the digital foundation of the site.
- Mesh & Texture: Finally, the points are connected to create a solid 3D mesh, which is then draped with the original photo data to produce a photorealistic model.
This technology has become a cornerstone for major Australian industries. By 2023, drone-based surveying was already deeply embedded in agriculture and mining for everything from operational monitoring to environmental compliance. In fact, projections show that by 2043, Aussie farmers will be making 500,000 drone flights every year just to keep an eye on crops. It shows just how indispensable this data has become.
Quality Control at Every Step
Great data processing isn't about hitting ‘go’ and hoping for the best. It’s a methodical process of checks and balances to ensure the final outputs are genuinely accurate.
For instance, after the initial aerial triangulation, the very first thing you should do is review the camera alignment report. It shows you exactly how well the images were stitched together. You're looking for any misalignments or gaps—these are the early warning signs of a potential problem down the line.
Once your point cloud is generated, your next job is to check its accuracy against your GCPs. The software will calculate the Root Mean Square Error (RMSE), which is just a fancy way of saying it measures the average difference between your model and your known points on the ground. For survey-grade work, you should be aiming for an RMSE of 1-2 times your Ground Sampling Distance (GSD).
Think of your GCPs as the anchors holding your map to the real world. If your model's accuracy doesn't stack up against them, then nothing else you extract from that data can be trusted. It’s a pass/fail moment for the entire survey.
From 3D Models to Valuable Deliverables
With a validated model in hand, you can finally start creating the specific outputs the project needs. The raw point cloud itself is rarely the final product. Instead, it’s the foundation for a whole range of valuable resources. To see how this data is put to work, check out our guide on the powerful combination of drones and GIS.
For many projects in construction and engineering, converting point cloud data into BIM models is a critical next step, allowing the digital twin to be integrated into design and planning workflows.
Here’s a look at some of the most common deliverables you can generate and how they’re used across different sectors in Australia.
Key Deliverables from a UAV Aerial Survey
| Deliverable | Description | Primary Industry Application |
|---|---|---|
| Orthomosaic Map | A high-resolution, distortion-free aerial map stitched together from all the images. | Construction, Real Estate, Environmental Monitoring |
| Digital Surface Model (DSM) | A 3D model of the ground surface that includes all objects on it, like buildings and trees. | Urban Planning, Telecommunications |
| Digital Terrain Model (DTM) | A ‘bare-earth’ model showing just the ground, with all buildings and vegetation stripped away. | Hydrology, Engineering, Earthworks |
| Volume Calculations | Precise measurement of stockpiles, pits, or earthworks based on the 3D model. | Mining, Civil Construction, Quarries |
| Contour Lines | Topographic lines connecting points of equal elevation, generated from the DTM. | Land Surveying, Agriculture |
Each of these outputs provides a different layer of insight, turning a simple drone flight into an incredibly powerful tool for measurement, analysis, and confident decision-making.
Validating and Delivering Your Final Survey Data
You’ve done the hard yards—the planning, the flying, the processing. But your job isn’t finished yet. The final step in any professional UAV aerial survey is where you prove the real value of your work: validating the data and handing it over to your client in a way they can actually use.
This isn't just about ticking a box. It's about demonstrating the integrity of your results and building trust. Before any data leaves your office, you need to put it through its paces to make sure it’s accurate and reliable enough for the decisions that depend on it, whether that's for engineering design or a major earthworks project.
Scrutinising the Visual and Geometric Integrity
First things first, you need to give your final orthomosaic map a good, hard look. I mean really get in there—zoom right in, pan across every corner of the site, and actively search for any visual flaws or oddities. These little artefacts can be tell-tale signs of bigger issues during capture or processing.
I’ve seen a few common culprits pop up over the years:
- Blurry or Smudged Areas: This often means the drone was flying too fast for the shutter speed, or the light conditions just weren't good enough.
- Warping or Distortion: If you see buildings or other straight lines looking a bit wavy, it’s a red flag. This usually points to not enough image overlap or a problem with the camera calibration.
- Seamline Mismatches: Visible lines where the photos are stitched together are a dead giveaway that something went wrong in the mosaicking stage.
- Colour Inconsistencies: Big shifts in colour or brightness across the map? That’s typically caused by changing cloud cover or sun angles during the flight.
Once the visual check is done, you have to prove the geometric accuracy. This is where your independent check points earn their keep. These are the extra ground points you measured with your GNSS rover—the ones you didn't use as GCPs during processing.
By comparing the coordinates of these check points in your model against their real-world measured positions, you get a completely unbiased report card on your survey's absolute accuracy. This gives you cold, hard numbers to prove your data is within the required project tolerances.
Crafting a Comprehensive Survey Report
Just dumping a folder of files on a client is a recipe for confusion. A professional survey report is absolutely essential. It tells the full story of the project, explains how you got your results, and gives the client the context they need to trust and use the data properly.
Think of the report as the official record of the survey. It should be clear, concise, and totally transparent.
A detailed survey report is more than just a formality; it's your proof of diligence. It demonstrates that you've followed a rigorous methodology and provides a transparent record of the data's quality, which is crucial for any project where engineering or financial decisions are on the line.
So, what needs to go in there?
- Project Overview: A quick rundown of the project goals, the site location, and when the survey took place.
- Equipment Used: Be specific. List the drone, camera/sensor, and GNSS gear you used.
- Methodology: Explain your flight parameters like altitude and overlap, your GCP strategy, and the coordinate system you worked in.
- Processing Summary: Note the software you used and any key settings that influenced the outcome.
- Accuracy Statement: This is the most important bit. Clearly state the final horizontal and vertical accuracy, as validated against your independent check points.
Packaging and Delivering the Final Files
The last piece of the puzzle is getting the data to your client in a format they can actually open and work with. It pays to have this conversation right at the start of the project to avoid headaches later.
Engineers, for instance, will probably want CAD-friendly files like .DWG or .DXF that contain point clouds or contour lines. A GIS analyst, on the other hand, will be looking for the georeferenced GeoTIFF of the orthomosaic.
For project managers or other stakeholders who aren't technical experts, a cloud-based 3D model viewer can be a game-changer. It lets them fly through the site, take simple measurements, and really understand the data without needing any specialised software. When you package your UAV aerial survey data this thoughtfully, it becomes not just accurate, but genuinely useful.
Common Questions About UAV Aerial Surveys
When you're first diving into drone surveying, a few key questions always pop up. Getting these sorted out from the start is crucial for managing expectations, staying on the right side of the law, and making sure the data you capture is actually fit for purpose. Let’s walk through some of the most common ones we hear from people in the field.
How Accurate Can a Drone Survey Really Be?
This is usually the first thing everyone asks, and the answer isn't a single number—it all comes down to your process. If you do everything by the book with a well-planned mission, use Ground Control Points (GCPs), and fly an RTK-enabled drone, you can realistically expect horizontal accuracy within 2–3 centimetres and vertical accuracy down to about 5 centimetres.
But here's the catch: if you skip proper ground control, that accuracy can plummet, sometimes to several metres. The drone's onboard GPS just isn't enough for true survey-grade work. The real precision comes from tying your aerial data back to known, accurately measured points on the ground.
The final accuracy of your survey is a direct reflection of the effort you put in on the ground. It’s less about the drone's shiny specs and more about your commitment to a professional workflow, especially when it comes to ground control.
What are the Main Regulations I Need to Follow in Australia?
You absolutely have to get the legal side of things right. In Australia, the Civil Aviation Safety Authority (CASA) makes the rules. For any commercial work, you'll generally need to be a certified remote pilot (holding a RePL) and operate under a Remote Operator’s Certificate (ReOC).
There are a few golden rules you can never forget:
- You must always be able to see your drone with your own eyes (visual line-of-sight, or VLOS).
- Don't fly higher than 120 metres (400 feet) above the ground.
- Stay at least 30 metres away from anyone not directly involved in what you're doing.
- Steer clear of flying over busy areas, and never fly near an emergency situation.
Airspace is the other big one. Before you even think about taking off, you have to check CASA's drone safety maps. This ensures you're not in a restricted zone, too close to an aerodrome, or in any other no-fly area. These rules exist for everyone's safety, and there’s no room for compromise.
How Should I Handle Bad Weather During a Survey?
Weather is the one thing you can't control, but you can definitely plan for it. High winds are a survey killer. They can shake the drone, leading to blurry photos, and they chew through battery life like you wouldn't believe. Every commercial drone has a maximum wind resistance rating—know it, and respect it.
Rain is an absolute no-go. Most drones aren't waterproof, and even a bit of drizzle can fry the electronics or mess with your camera's lens. The same goes for fog or low clouds; if you can't see, you can't fly safely, and your data quality will be shot.
Your best defence is to be prepared. Check detailed aviation forecasts before you even leave for the site. If the weather looks iffy, it’s almost always smarter to reschedule. A postponed flight costs a lot less than a failed survey, a damaged drone, or a safety incident.
At Innoflight International, we provide advanced, reliable drone platforms and sensors designed for professional survey applications. Our systems are built to deliver the high-precision data your projects demand. To find the right solution for your needs, explore our offerings.