At its core, UAV 3D mapping is the art and science of creating a precise, interactive digital replica of a real-world place. We use a drone to capture hundreds, sometimes thousands, of high-resolution images, and then specialised software meticulously stitches them together. The result is a highly detailed 3D model—what many in the industry call a digital twin—that you can measure and analyse from your desk.
How We Go From Drone Photos to a Digital Twin
So, how does this actually work? Think of it like building a massive, incredibly detailed digital sculpture. The drone is your eye in the sky, flying a pre-planned grid pattern over a site. As it flies, it systematically captures overlapping aerial photos, each one providing a slightly different perspective of the same features on the ground.
This overlap is the secret sauce. Sophisticated software gets to work analysing these images, identifying common points between them, and using complex algorithms to calculate depth, distance, and geometry. It’s like assembling a giant, three-dimensional puzzle, ultimately building a measurable model of the landscape, building, or construction site below.
The Key Outputs You Actually Get
The journey from a drone flight to a useful model produces a few key digital assets. The first and most fundamental is the point cloud. This is essentially a massive collection of tiny dots, each with its own precise X, Y, and Z coordinate in space. It forms the foundational skeleton of your digital environment.
From this raw data, we can create other incredibly useful formats:
- 3D Mesh Models: These are the photorealistic, textured models that look just like the real thing. They're perfect for visual inspections, tracking site progress, or creating compelling presentations.
- Digital Elevation Models (DEMs): These maps digitally strip away all the buildings, trees, and vegetation to show you the bare earth's topography. Incredibly useful for earthworks planning and drainage analysis.
- Orthomosaic Maps: Think of these as a super-powered Google Map. They are high-resolution, geographically-corrected 2D maps that stitch all the aerial photos into one seamless, distortion-free image.
This capability is precisely why the drone industry is booming. Here in Australia, the drone market was valued at around USD 1.05 billion and is expected to rocket to nearly USD 2.7 billion by 2030. That growth shows just how indispensable this tech has become for industries like construction, mining, and agriculture. You can learn more about the Australian drone market and its projections.
At the end of the day, the principle is simple: capture overlapping images from multiple angles to create depth. By flying a pre-planned, automated route, the drone ensures you get the complete and consistent data needed to build an accurate 3D map.
To give you a clearer picture, here’s a quick breakdown of the core concepts.
Key Concepts in UAV 3D Mapping at a Glance
| Component | Role | Analogy |
|---|---|---|
| Drone (UAV) | The data collection platform. | The scout who surveys the land from above. |
| Sensor (Camera/LiDAR) | The 'eye' that captures the raw data. | The artist's sketchbook, capturing details of the scene. |
| Ground Control Points (GCPs) | Known points on the ground for georeferencing. | Anchor points on a map, ensuring everything lines up. |
| Photogrammetry Software | Processes images to create 3D models. | The puzzle master who assembles thousands of pieces. |
| Point Cloud | The raw 3D data; a collection of coordinate points. | The initial clay sculpture before it's refined. |
| 3D Mesh Model | A textured, photorealistic visual model. | The final, painted, and detailed sculpture. |
| Orthomosaic Map | A geographically accurate 2D map. | A high-resolution, perfectly flat aerial photograph. |
This table helps visualise how each piece fits into the larger puzzle of creating a digital twin.
The Two Pillars of Data Capture
To get the job done, we rely on two primary technologies: photogrammetry and LiDAR.
Photogrammetry, which we've mostly been discussing, uses cameras to capture images. It's incredibly versatile and the most common method out there.
LiDAR (Light Detection and Ranging) is a bit different. It’s an active sensor that shoots out pulses of laser light and measures how long they take to bounce back. This gives you exceptionally precise distance measurements, creating intensely accurate point clouds, especially in vegetated areas. We'll dig into the pros and cons of each in the next section.
Choosing Your Technology: Photogrammetry vs LiDAR
https://www.youtube.com/embed/Kyrtu0usfKU
When you get into UAV 3D mapping, you’ll quickly hear about two main technologies: photogrammetry and LiDAR. They both create incredibly detailed 3D models, but they get there in completely different ways. Picking the right one isn't just a technical choice—it directly affects your project's budget, accuracy, and ultimately, its success.
Think of photogrammetry as the art of turning a collection of 2D photos into a 3D world. It's a passive approach where a drone flies a pre-planned grid pattern, snapping hundreds—sometimes thousands—of high-resolution, overlapping pictures. Specialised software then gets to work, finding common points across all those images to calculate depth and stitch everything together into a cohesive 3D model.
It’s a lot like how our own eyes work. Each eye sees a slightly different perspective, and our brain fuses them to give us a sense of depth. Photogrammetry does the same thing, just with a lot more data points. To really get into the nuts and bolts, our guide on what is aerial photogrammetry explains this powerful technique in more detail.
Photogrammetry: The Versatile Visual Mapper
Because it relies on standard high-resolution cameras, photogrammetry is often the more accessible and budget-friendly way to get into UAV 3D mapping. Its real strength is creating visually stunning, photorealistic models that capture true-to-life colours and textures.
This makes it the perfect fit for a whole host of jobs:
- Construction Site Monitoring: Keeping an eye on progress with detailed, visual 3D models.
- Real Estate Marketing: Building immersive virtual tours that let people explore a property from anywhere.
- Agricultural Crop Inspection: Checking on plant health by analysing colour and texture from above.
- Basic Topographic Surveys: Generating solid elevation maps in open, clear terrain.
If your main goal is a realistic visual record and you're working within a sensible budget, photogrammetry is a fantastic place to start. It delivers brilliant value and detail for most common mapping projects.
LiDAR: The Precision Laser Scanner
Now, let's look at LiDAR (Light Detection and Ranging). Where photogrammetry is passive, LiDAR is an active system. It works by firing out thousands of tiny laser pulses every second and measuring how long it takes for each pulse to hit a surface and bounce back. It's basically echolocation, but with light instead of sound.
Every laser return gives you an exact distance measurement, which builds up a dense "point cloud" of data. This method is famous for its incredible geometric precision and, most importantly, its ability to cut through vegetation.
LiDAR doesn't just map the top of a forest canopy. It sends pulses that can hit branches, the undergrowth, and even the true ground hidden beneath it all. For anyone trying to survey a site covered in trees, this is an absolute game-changer.
LiDAR is the technology you turn to when accuracy is everything. Its biggest wins are in projects like:
- Forestry and Environmental Management: Mapping the true ground topography under thick tree cover.
- Powerline and Corridor Mapping: Spotting vegetation getting too close to powerlines with millimetre-level precision.
- Engineering-Grade Surveys: Creating highly accurate models needed for designing and building infrastructure.
- Mining Operations: Calculating exact stockpile volumes and monitoring the stability of pit walls.
This infographic breaks down the decision-making process into a simple flowchart to help guide your choice.
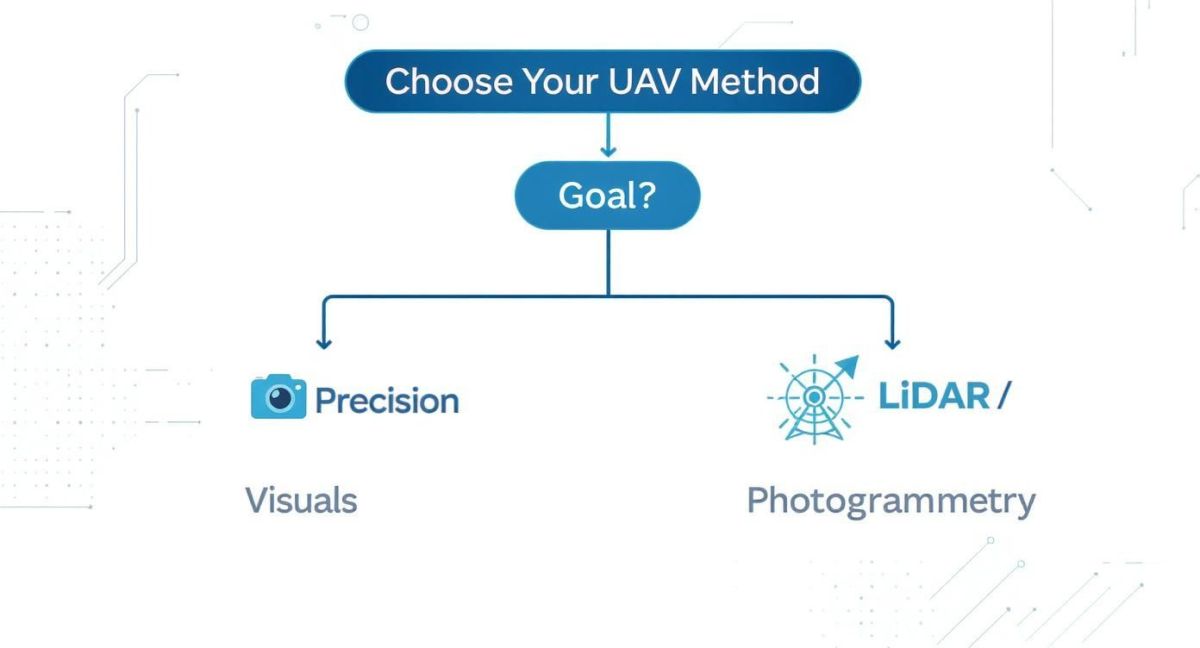
As the chart shows, if you need rich visual documentation, photogrammetry is your best bet. But if precise, hard measurements are what you're after, LiDAR is the clear winner.
Photogrammetry vs LiDAR: A Practical Comparison
Choosing between these two isn't always straightforward. It often comes down to a trade-off between visual detail, accuracy, and cost. This table breaks down the key differences to help you decide what makes the most sense for your specific project.
| Feature | Photogrammetry | LiDAR |
|---|---|---|
| Data Type | Image-based (pixels) creating textured meshes | Point-based (laser returns) creating point clouds |
| Accuracy | High relative accuracy, but can be lower absolute accuracy | Extremely high absolute geometric accuracy |
| Cost | Lower hardware and software costs | Higher initial investment for sensor and processing |
| Vegetation Penetration | Poor; only captures the top surface of canopy | Excellent; can measure the ground beneath dense foliage |
| Lighting Conditions | Requires good, consistent ambient light | Can operate in low-light or even at night |
| Output | Photorealistic, full-colour 3D models | Highly precise, geometrically accurate point clouds |
| Best For | Visual inspections, marketing, progress monitoring | Engineering surveys, forestry, corridor mapping |
Ultimately, your decision comes down to your project's specific needs.
Making the Right Decision for Your Project
So, which one is it? The right choice really boils down to three things: your accuracy needs, the site conditions, and your budget. Photogrammetry gives you beautiful, detailed results for a lower cost, but it can run into trouble in areas that lack visual texture, like a sandy beach or a snow-covered field. It also can't see through trees.
LiDAR, on the other hand, delivers best-in-class geometric accuracy and easily punches through foliage, but the gear and software come with a higher price tag. For big-ticket infrastructure projects or critical environmental surveys, that extra investment is often well worth it for the quality and reliability of the data you get. Take a hard look at what you need to deliver, and the right choice will become clear.
Executing Your UAV 3D Mapping Workflow

Knowing the tech is one thing, but putting it to work is where the real value gets created. A successful UAV 3D mapping project is so much more than just flying a drone. It’s a structured, methodical process that turns raw aerial data into precise, actionable intelligence.
Think of it like building a custom piece of furniture. You wouldn't just start sawing timber without a plan. You need to measure, design, assemble, and finish it properly. In the same way, a professional mapping workflow ensures every step builds logically on the last, all leading to a high-quality final product.
We can break the whole operation down into four distinct stages. Each one is critical for getting the accuracy and detail that professional applications demand. Let's walk through the entire workflow, from start to finish.
Stage 1: Mission Planning and Preparation
Before the propellers even start spinning, the most important work has already begun. This is the strategic phase where you define the project's goals and set yourself up for success. Rushing this step is a classic mistake that can easily compromise the entire project.
First up, you need to clearly outline the survey area on a map and identify any potential hazards—think powerlines, tall trees, or nearby buildings. You also have to check local airspace regulations to make sure your flight is both safe and compliant. This is also when you’ll figure out where to place your Ground Control Points (GCPs). These are clearly marked targets on the ground with known coordinates that act like anchors, locking your digital model to its exact spot in the real world.
Once the site has been properly assessed, you’ll use mission planning software to map out an automated flight plan. This involves setting a few key parameters:
- Flight Altitude: Flying higher covers more ground faster but gives you lower resolution. Flying lower captures incredible detail but takes much more time and battery life.
- Image Overlap: This is absolutely crucial. A typical setting is 70-80% front and side overlap, which ensures the software has plenty of common data points to accurately stitch the images together.
- Camera Angle: For most 2D maps, the camera points straight down (nadir). But for 3D models of structures like buildings, you need an angled (oblique) view to capture all the vertical surfaces.
Stage 2: Data Acquisition in the Field
With a solid plan locked in, it’s time to fly. This stage is all about executing the pre-programmed mission and capturing the highest quality raw data you possibly can. The drone will fly the automated grid pattern you designed, systematically snapping photos or collecting LiDAR scans.
While the flight itself is automated, the pilot's role is still vital. They monitor the drone’s progress, keep an eye out for unexpected obstacles like birds or low-flying aircraft, and manage battery swaps for larger jobs. It’s also best practice to take photos of your GCPs on the ground and record their precise coordinates with a high-accuracy GNSS rover.
A successful data acquisition phase comes down to one thing: consistency. Consistent lighting, consistent flight parameters, and thorough coverage are the key ingredients for clean data that processes smoothly and produces a highly accurate model.
Stage 3: Data Processing and Model Generation
This is where the digital magic happens. Back in the office, you’ll load the hundreds (or thousands) of images and the GCP data into specialised photogrammetry software. The software then kicks off the intensive task of building your 3D model.
The process generally follows these steps:
- Image Alignment: The software analyses all the images, finds matching features across the overlapping photos, and figures out the camera's exact position and orientation for every single shot.
- Point Cloud Generation: Using those aligned images, it creates a dense point cloud. This is the foundational 3D dataset that represents the site's geometry.
- 3D Mesh and Texture Creation: The software then connects the dots in the point cloud to form a solid 3D mesh before draping the original photos over it. This creates a photorealistic, textured model.
- Orthomosaic and DEM Generation: Finally, it can produce other key deliverables like a high-resolution 2D orthomosaic map and a Digital Elevation Model (DEM).
This processing stage can take anywhere from a few hours to several days, depending on how large the dataset is and how powerful your computer is. For a deeper dive into the specifics, our overview of a complete UAV aerial survey provides more context.
Stage 4: Analysis and Delivery
The final stage is all about turning that impressive model into valuable insights. A 3D model looks great, but its real power is in what you can extract from it. This is where you perform analysis and deliver the results to stakeholders.
Using the model and specialised software, you can now do a whole range of tasks that would be difficult, time-consuming, or unsafe with old-school methods.
- Make precise measurements of distance, area, and slope.
- Calculate stockpile volumes in mining or construction with incredible accuracy.
- Conduct cut-and-fill analysis for earthworks planning.
- Overlay design files (CAD) to compare the as-built reality against the plan.
- Perform virtual site inspections from the safety of the office.
The final deliverables are then exported in formats compatible with industry-standard software (like CAD or GIS) and shared with the project team. This completes the workflow, transforming a simple drone flight into a powerful tool for measurement, monitoring, and better decision-making.
Picking the Right Drone and Software for the Job
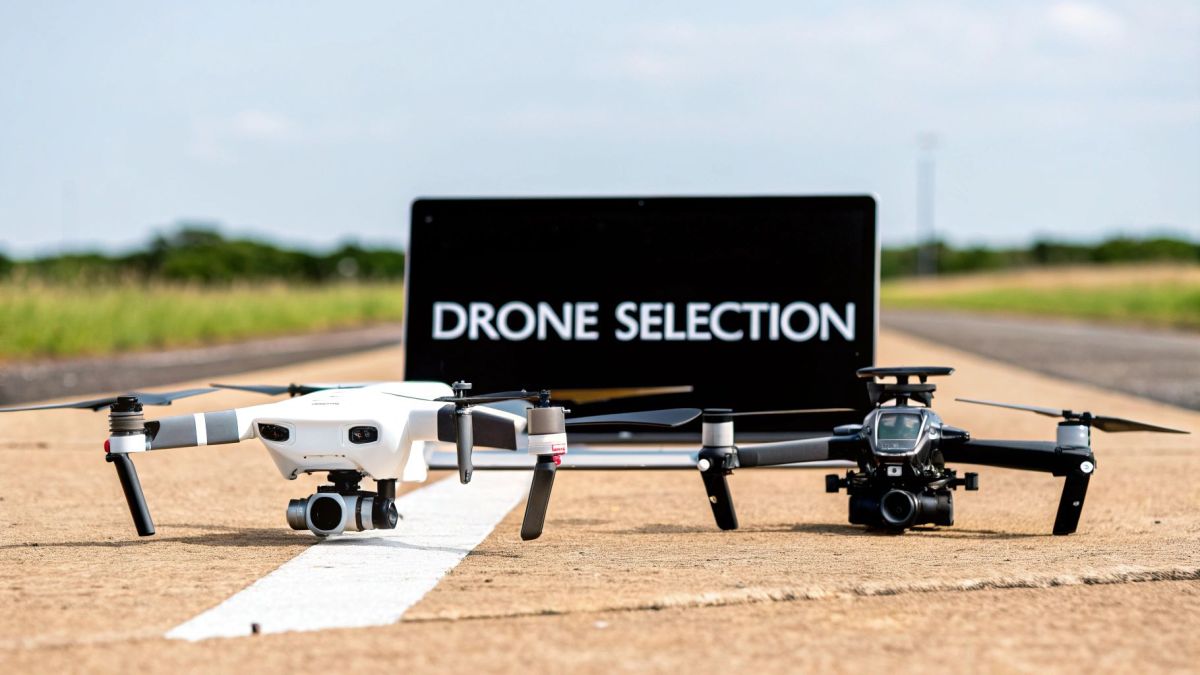
When it comes to UAV 3D mapping, the gear you use directly defines the quality of your results. Choosing the right drone and software isn't just a technical box-ticking exercise; it’s a strategic decision that affects your efficiency, accuracy, and the project's bottom line. The market is flooded with options, but things get a lot simpler once you know what you’re trying to achieve.
The first big decision you’ll make is the type of drone itself. This choice really boils down to the size and complexity of the area you need to map.
Fixed-Wing vs Multi-Rotor Drones
Mapping drones generally fall into two main camps: fixed-wing and multi-rotor. Think of a fixed-wing drone as a small aeroplane. It’s built for endurance and speed, which makes it the go-to choice for mapping massive, open areas like sprawling farms or long stretches of infrastructure.
Because it flies like a plane, it can stay in the air for much longer—often an hour or more—and cover hundreds of hectares in one go. This makes it incredibly efficient for large-scale agricultural surveys or mapping an entire mining site.
A multi-rotor drone, on the other hand, is what most people picture when they hear the word "drone"—it’s essentially a helicopter. Its biggest strengths are its incredible manoeuvrability and its ability to hover in place, take off, and land vertically. This makes it the undisputed champion of complex, detailed environments.
Multi-rotor drones are perfect for capturing the intricate details of vertical structures like building facades, inspecting bridges, or mapping small, cluttered construction sites. Their ability to just stop and hover means they can gather data from multiple angles with pinpoint precision.
Here’s a quick breakdown of how they compare for common mapping jobs:
- Large-Scale Farmland Survey: Fixed-wing is the clear winner for its superior flight time and coverage.
- Detailed Building Inspection: A multi-rotor is a must-have for its ability to capture vertical surfaces and get into tight spots.
- Corridor Mapping (e.g., a powerline): Fixed-wing is usually preferred here for its efficiency over long distances.
- Small Construction Site Monitoring: The detail and flexibility of a multi-rotor are essential for such a dynamic environment.
Key Drone Features to Look For
Beyond the basic drone type, a few key specifications really determine if a drone is up to the task of professional mapping. It’s important to look past the marketing hype and focus on the features that actually impact your data quality and how you work in the field.
When you’re sizing up a drone for UAV 3D mapping, pay close attention to these things:
- Flight Time and Endurance: This tells you how much ground you can cover on a single battery. A longer flight time (typically 30+ minutes for multi-rotors) means fewer battery changes and a much more productive day on site.
- Payload Capacity: This is simply the maximum weight the drone can carry. It's a critical spec for making sure your drone can handle high-end sensors, like heavier LiDAR systems or advanced multispectral cameras.
- Sensor Compatibility: Not every drone can carry every sensor. You need to make sure the model you pick is compatible with the specific camera or LiDAR unit you plan to use—after all, the sensor is the heart of your entire data collection setup.
- RTK/PPK Capability: If you’re aiming for survey-grade accuracy, look for drones with built-in Real-Time Kinematic (RTK) or Post-Processed Kinematic (PPK) systems. These provide centimetre-level positional accuracy, which dramatically cuts down on the need for setting out ground control points.
The Software That Powers It All
Your drone is only half the story. The software you use is what turns a simple flight into a valuable, measurable digital asset. This software ecosystem breaks down into two main categories: flight planning and data processing.
Flight Planning Software is your mission control. It's where you outline the survey area, set flight parameters like altitude and image overlap, and create the automated flight path your drone will follow. A good flight planning app makes it simple to design missions that are both safe and efficient.
Data Processing Software does all the heavy lifting back at the office. This is the engine that takes your raw aerial data—whether it's thousands of photos or a LiDAR scan—and runs it through complex algorithms to generate point clouds, 3D mesh models, and orthomosaic maps. Be warned, these programs are resource-hungry and often need a powerful computer to chew through large datasets.
Choosing the right software is just as crucial as picking the drone. To help you sort through the options, our detailed guide on the best software for UAV operations offers a comprehensive look at what’s out there. By carefully matching your drone and software to your project goals, you’ll build a powerful toolkit that's ready to deliver professional-grade results.
How UAV 3D Mapping Is Remaking Industries
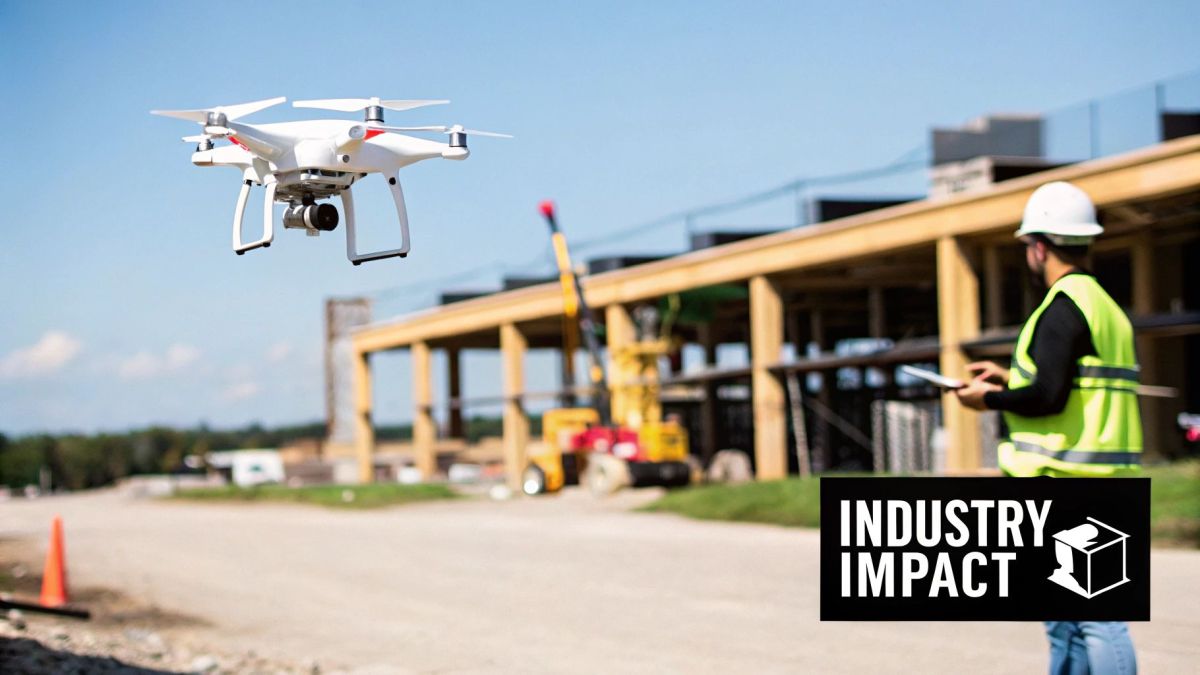
It’s one thing to talk about the technology, but the real story is how it's being used on the ground. Across Australia, UAV 3D mapping is solving old problems with incredible new speed, safety, and accuracy. This isn't just about creating flashy visuals; it's about delivering hard data that changes how businesses operate.
From the enormous open-cut mines of Western Australia to the tight construction sites in Sydney, drones offer a bird's-eye view that was once the stuff of science fiction. Let's dig into how different sectors are putting this tech to work.
Mining and Resource Management
In mining, you live and die by efficiency and safety. UAV 3D mapping has quickly become a must-have, kicking slow and often dangerous manual surveys to the kerb. Mine operators now use drones for routine checks of everything from stockpiles and pits to tailings dams.
Think about it: instead of sending a survey team to scramble over a massive pile of ore, a drone can map the whole thing in a tiny fraction of the time. The 3D model it produces lets managers calculate volumes with an accuracy of over 99%. That means precise inventory for financial reports and logistics. This fast turnaround of information is key to optimising the entire operation.
The safety benefits are just as huge. Using drones to inspect high-risk spots like unstable pit walls means fewer people have to enter environments where things could go wrong.
The performance gains are clear. Newer UAV tech is projected to map mine sites up to 50% faster than traditional aerial methods, all while boosting data accuracy by 35%. It's this combination of cost savings and improved safety that’s driving such rapid uptake in the industry.
Construction and Engineering
The engineering and construction industries are also being reshaped by UAV 3D mapping, which provides a fast and reliable stream of site data. For a project manager, a construction site is a beast that's always changing. Drones have become the ultimate tool for keeping track of it all.
By flying the site every week or two, firms create up-to-date 3D models and orthomosaic maps. These "as-built" models can then be dropped right over the original design plans in CAD or BIM software. Suddenly, any difference between the plan and what’s actually happening on the ground jumps right out. Small issues can be fixed immediately before they balloon into expensive problems.
This simple workflow adds value at every stage:
- Earthworks Analysis: Drones accurately measure cut and fill volumes, making sure the groundwork is spot on and contractors are paid for the exact work they've done.
- Progress Tracking: Stakeholders get clear visual updates on project milestones without having to step foot on site, which keeps everyone on the same page.
- Safety Audits: From a safe distance, a site manager can use the 3D models to spot potential hazards, plan crane placements, and check that safety rules are being followed.
Agriculture and Land Management
For farmers, UAV 3D mapping is a leap from guesswork to data-driven farming. High-resolution 3D maps and elevation models give them a crystal-clear picture of their land's topography. This is gold for planning irrigation and managing water runoff.
But it gets even better when drones are fitted with multispectral sensors. These cameras see what the human eye can't, picking up on subtle signs of crop health. This means spotting problems like pests, nutrient gaps, or water stress way earlier than was ever possible before.
Armed with this intel, farmers can apply water, fertiliser, or pesticides with surgical precision—a practice we call precision agriculture. It not only improves crop yields but also slashes costs and is better for the environment. It’s a classic case of turning smart data into a healthier, more profitable harvest.
Your Top Questions About Drone 3D Mapping, Answered
If you’re just getting into drone 3D mapping, you’ve probably got a few practical questions on your mind. That's a good thing. Getting clear answers on what this technology can realistically deliver is the first step to a successful project.
So, let's cut through the technical jargon and tackle the big ones: accuracy, cost, regulations, and how long it all takes.
What Level of Accuracy Can I Really Expect?
This is usually the first question I get asked, and for good reason—the accuracy of the data directly determines its value.
Under the right conditions, a professional drone mapping project can achieve horizontal accuracy within 2–3 centimetres and vertical accuracy down to about 5 centimetres.
But it's crucial to understand that this isn't a given. Hitting that level of precision takes a deliberate, professional approach. The biggest factors that come into play are:
- Ground Control Points (GCPs): Think of these as high-precision anchors. Using accurately surveyed GCPs is the best way to lock your digital model into its exact real-world position. Without them, you might get a model that looks fantastic but isn't geographically reliable enough for serious work.
- RTK/PPK Drones: Drones fitted with Real-Time Kinematic (RTK) or Post-Processed Kinematic (PPK) systems are a game-changer. They provide centimetre-level GPS data for the drone itself, which massively boosts the accuracy of the final map.
- Flight and Processing Quality: Little details make a big difference. Flying at a consistent altitude, ensuring high image overlap (I always aim for 70-80%), and being meticulous during data processing are all non-negotiables for a precise result.
In short, yes, survey-grade accuracy is very achievable. It just requires a professional workflow. While visual progress shots might not need such tight tolerances, for anything related to engineering, construction, or earthworks, precision is everything.
What Are the Main Costs Involved?
The cost of a drone mapping project isn't a one-size-fits-all number; it can vary quite a bit depending on what you need. Think of it less like buying a product off the shelf and more like commissioning a custom service.
Here’s what typically drives the price:
- Area Size and Complexity: Mapping a large, flat, open paddock is going to be far simpler—and therefore cheaper—than mapping a cluttered industrial site with lots of buildings and obstructions.
- Accuracy Requirements: If you need survey-grade precision, that means more time on-site setting up GCPs and likely using more advanced equipment. This extra work and tech will be factored into the cost.
- Technology Used: As a rule of thumb, LiDAR projects tend to be more expensive than photogrammetry. The LiDAR sensors and specialised software simply cost more to own and operate.
- The Final Deliverables: What do you need at the end of the day? A basic orthomosaic map is one thing, but a fully textured 3D mesh model with detailed volume calculations is another, and the price will reflect that level of analysis.
What Australian Regulations Do I Need to Know?
When you’re flying a drone for commercial work in Australia, you're operating under rules set by the Civil Aviation Safety Authority (CASA). These regulations are there to keep everyone safe, both in the air and on the ground.
For any commercial drone 3D mapping, the operator generally needs to hold a Remotely Piloted Aircraft Operator's Certificate (ReOC).
The pilots themselves usually need a Remote Pilot Licence (RePL) to fly for a ReOC holder. This ensures they're properly trained, insured, and follow strict safety protocols, like conducting a thorough risk assessment before every single flight. This framework has helped professionalise the Aussie drone industry, which is seeing huge demand in sectors like mining and construction. In fact, this part of the market is expected to grow at a compelling 27% CAGR between 2025 and 2034, partly because we have such a clear and robust regulatory environment. You can explore more on the Australian drone market's growth here.
How Long Does a Typical Project Take?
It’s a common myth that the work is done once the drone lands. In my experience, the flight itself is often the quickest part of the entire job. A standard project, from the first phone call to delivering the final files, can take anywhere from a few days to a couple of weeks.
Here’s a rough breakdown of the timeline:
- Planning and Quoting (1-3 days): This involves our initial chats, assessing the site with satellite imagery, and putting together a detailed proposal.
- Fieldwork (1-2 days): This is the on-site component—driving to the location, setting up GCPs, and flying the mission. A 50-hectare site might only take a few hours of actual flight time.
- Data Processing (2-5 days): Here's where the real heavy lifting happens. Stitching thousands of high-resolution images into a point cloud and 3D model takes serious computing power and time.
- Analysis and Delivery (1-2 days): The final step is to pull out the specific measurements you need, prepare any reports, and get the final data files over to you.
At Innoflight International, we provide the advanced unmanned aerial systems and expert support needed to execute high-precision mapping projects with confidence. Discover our versatile drone solutions and see how we can help you achieve your project goals. Visit us at https://evolutionflight.com.